Berserkus
offline


Basic OC
11 Jahre dabei !
AMD Ryzen 7
3700 MHz
|
      
MSI X470 Gaming M7 AC Reader Review
- Introduction
- Package contents
- Technical data
- Layout, design and features
- BIOS, benchmark and results
- Software
- Conclusion
1. Introduction
As part of the MSI Test-IT 7.0 action I test for you the MSI X470 Gaming M7 AC.
Let's have a look at the board:
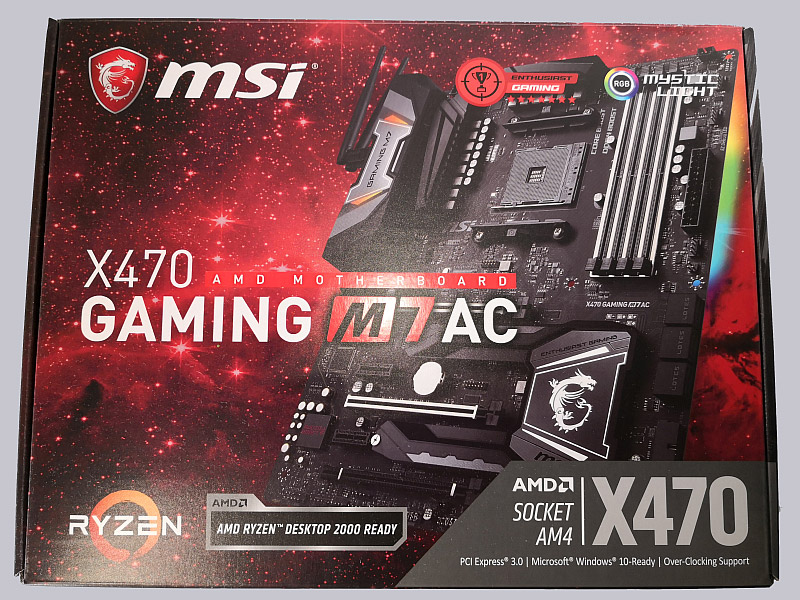
The packaging is, typical MSI, very high quality. But don't set any accents.
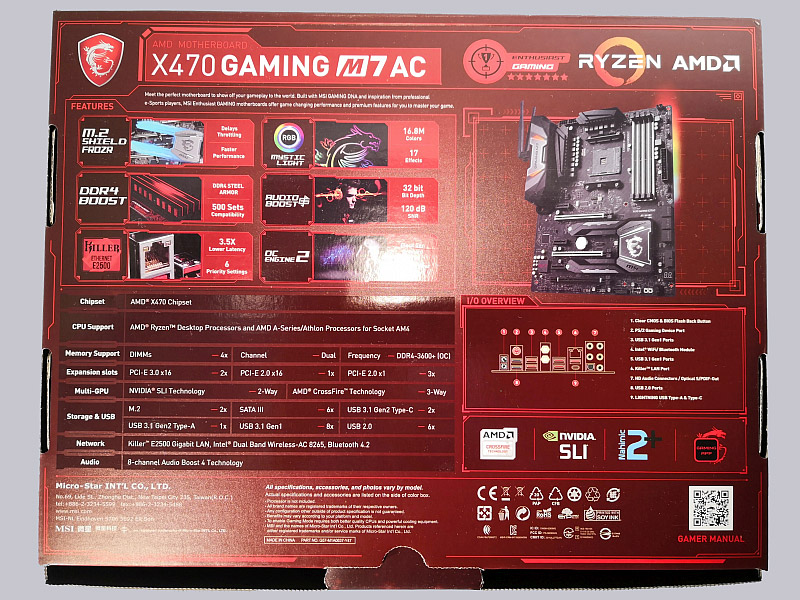
On the back we can see the details of the connectors and features of the mainboard.
2. Package contents
Included in the scope of delivery:
1x Slot bracket
2x SATA cable normal
2x SATA cable angled
1x 1 to 2 LED Extension Y cable 80cm
1x Corsair RGB LED Extension Cable 50cm
1x Rainbow RGB LED Extension Cable 80cm
1x Nvidia SLI bridge
1x Installation DVD
1x Label sticker for the SATA cable
1x Manual
1x Quick installation guide
2x M.2 screws
2x Antenna
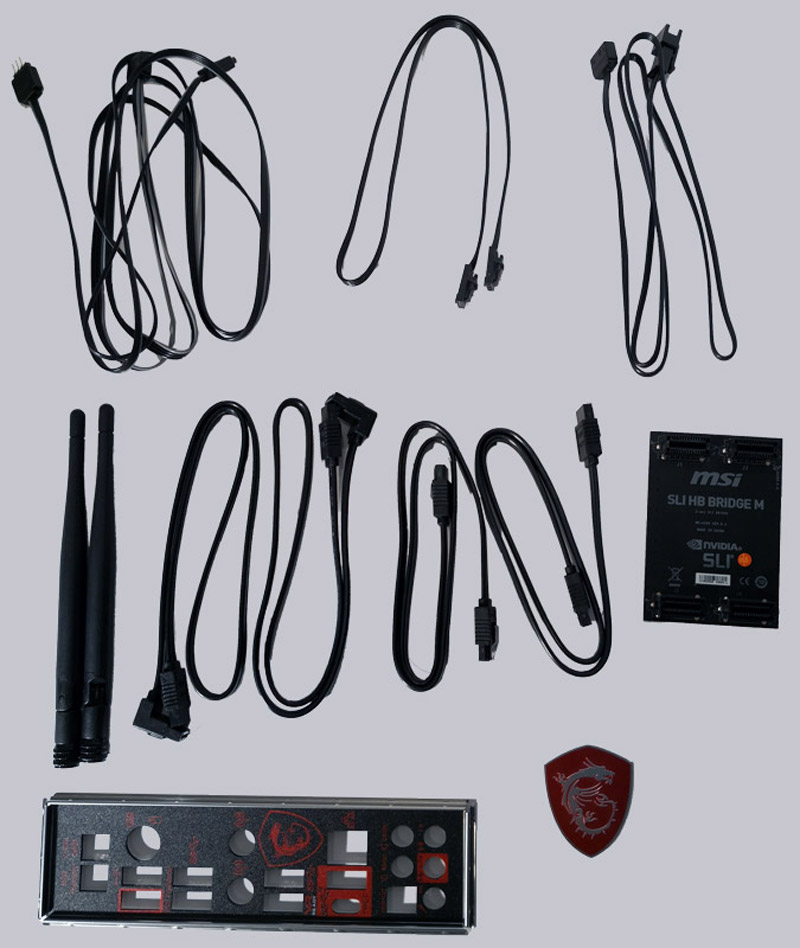
Also here I think it's a pity that there are no additional slot brackets for USB 2.0 and USB 3.0, because there are more than enough ports on the board.
The LEDs for the Mystic Light illumination are on the underside of the board and on the slot bracket.

The LEDs are located at the edges of the board at the level of the RAM slots.
Here is a small video showing the LEDs in operation.
MSI X470 Gaming M7 AC Mystic Light
3. Technical data
Let's get to the technical data:
- Model Name X470 Gaming M7 AC
- CPU supports AMD RYZEN series processors and 7th Gen A series / Athlon processors for AM4 socket
- CPU Socket AM4
- Chipset AMD X470 Chipset
- Graphics interface 2 x PCI-E 3.0 x16 slots + 1 x PCI-E 2.0 x16 slot
- 2-way SLI / 3-way CrossFire
- Memory support 4 DIMMs, Dual Channel 1866/ 2133/ 2400/ 2667(OC)/ 2933(OC)/ 3200(OC)/ 3600+ MHz
- Expansion slots 3 x PCI-E x1 slots
- 6x SATA 6Bb/s
- M.2 1x PCIe 3.0 x4, 1x PCIe 2.0 x4
- USB 3.1 Gen2 Type-A 1x
- USB 3.1 Gen1 8x
- USB 3.1 Gen2 Type-C 2x
- USB 2.0 6x
- Killer E2500 Gigabit LAN Controller
- Intel Dual Band Wireless AC 8265 Card with Bluetooth 4.2
- Audio 7.1 Channel High Definition Audio with S/PDIF
- Form Factor ATX
The features according to MSI
- Supports AMD RYZEN and AMD A-Series / Athlon processors in AM4 socket
- Supports DDR4-3600+(OC) memory
- M.2 SHIELD FROZR: This integrated M.2 cooling solution protects and optimizes your M.2 devices.
- DDR4 Boost with Steel Armor: Give your DDR4 memory a powerful performance boost
- Core Boost: Improved design to support multi-core processors
- MYSTIC LIGHT: Control 16.8 million colors and 17 effects with a single click
- MYSTIC LIGHT EXTENSION supports RGB and Rainbow LED stripes
- Duo-8-pin power connector: Two 8-pin power connectors provide enough power for ultimate processor performance
- AUDIO BOOST 4 with NAHIMIC: Reward your ears with studio-ready sound quality for the most immersive playing experience
- Turbo M.2 with M.2 Shield FROZR
- Killer LAN: The exclusive Killer network management prioritizes the connection of your games for smooth online gaming
- BIOS Flashback+: Easily restore your BIOS - no processor, memory or graphics card required
- MULTI-GPU: With Steel Armor PCI-E slots. Supports NVIDIA SLI and AMD Crossfire.
- Your weapons in the game: Game Boost, GAMING Hotkey, X-Boost, Voice Boost
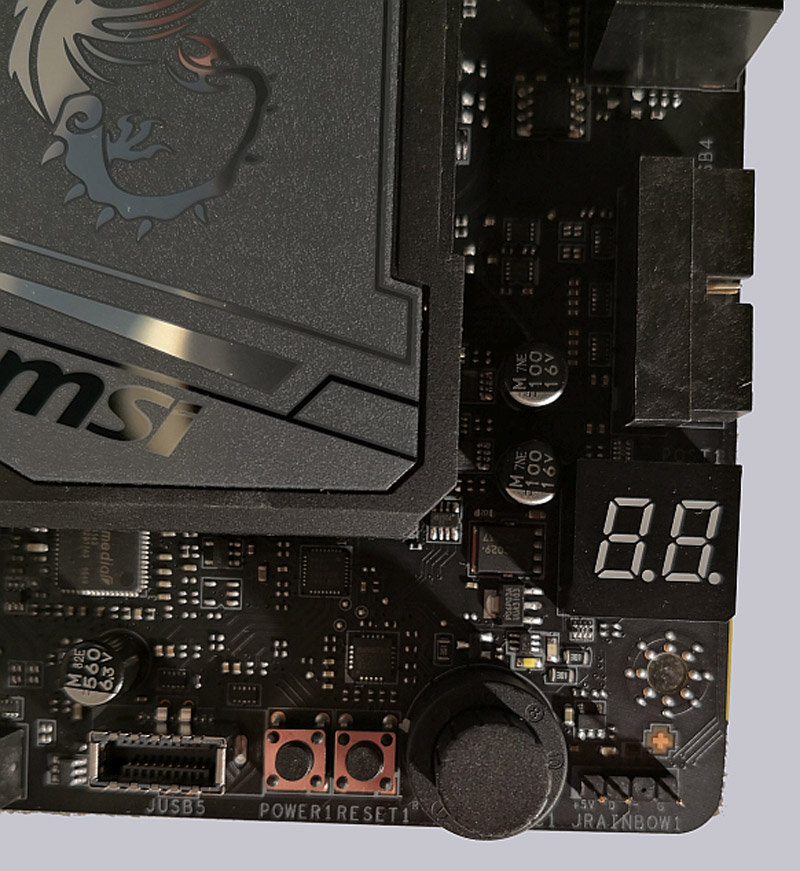
- EZ Debug LED: The easiest way to find errors
- Click BIOS 5: The award-winning BIOS now has high-resolution and scalable font, favorites and a search function.
- GAMING certified: Tested by eSports professionals for 24-hour online and offline gaming.
- WHQL certified for Windows 10
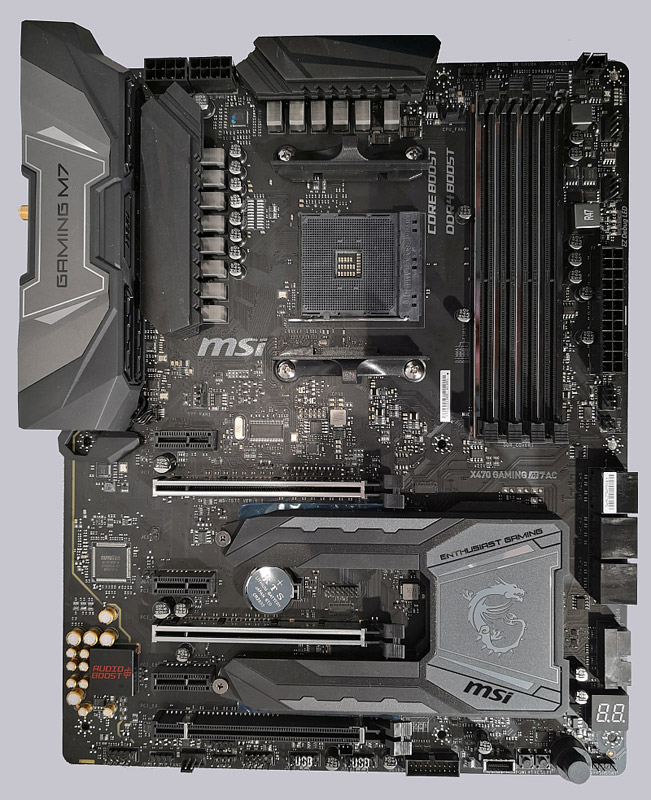
4. Layout, design and features
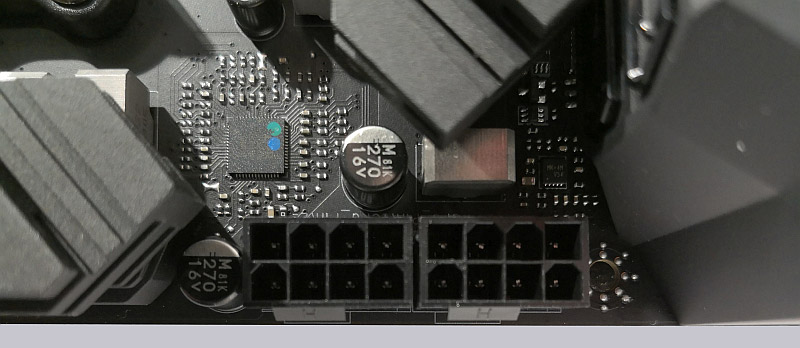
The MSI X470 Gaming M7 AC is a classic ATX board. In order to ensure smooth overclocking, MSI has provided the board with 2x 8 pin ATX power plugs.
You can find them in the top left corner at the cooling of the VRMs.
The black coloring of the board in connection with the silver accent on the IO-Shield, the Steel Armor PCIe and RAM Slot and the MSI Dragon Logo on the Southbridge. In combination with the very protruding and solid M.2 coolers, it looks noble but also a bit martial.
A very successful design, which I personally like very much!
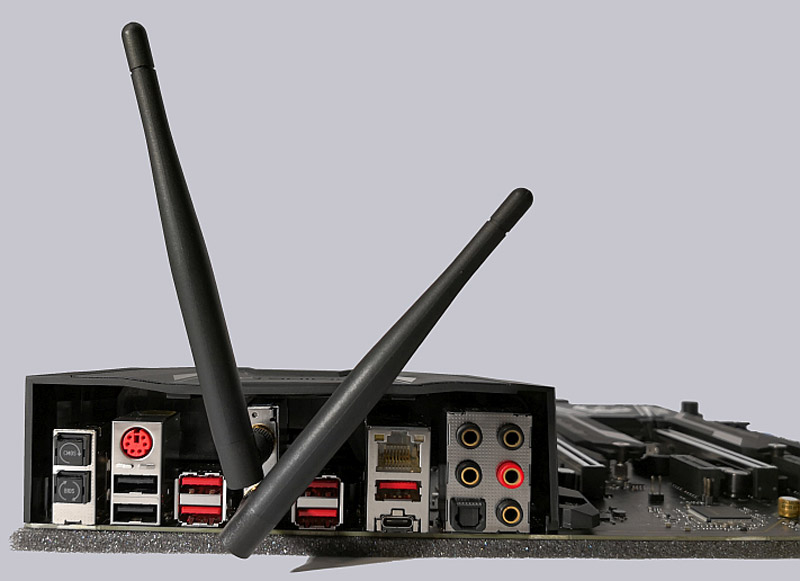
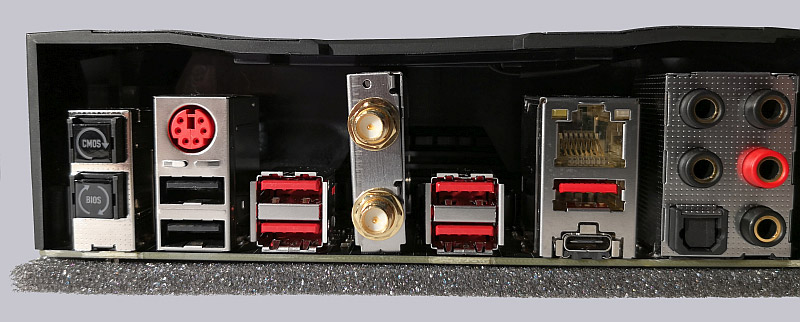
The rear IO connector panel is very well equipped with:
- Clear CMOS & BIOS Flash Back Button
- PS/2 Gaming Device Port
- 4x USB Gen 3.1 Type A
- USB Gen 3.1 Type C
- 2x USB 2.0 Type A
- Killer LAN Port
- HD Audio Connectors / Optical S/PDIF Output
- Lightning USB 1x Type-A / 1x Type-C
- Intel Wifi/Bluetooth Module
On the lower right side are the connectors for 6x SATA3 and one of the 19Pol USB 3.0 post connectors.
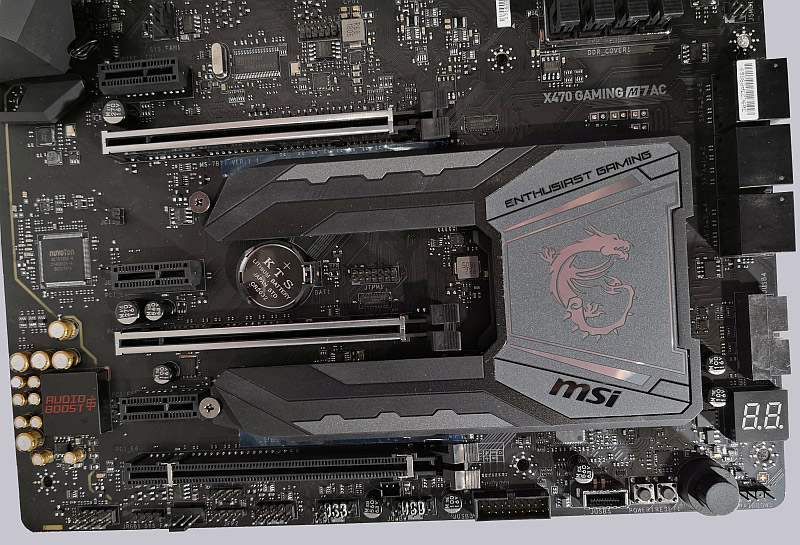
The lower right corner houses the rotary switch for hardware overclocking, the reset button, the power button and an additional USB 3.1 Gen2 type C connector on the left.
On the right side of the OC rotary switch is one of the RGB connectors.
The two M.2 slots are located under the massive M.2 cooler, which can be opened completely from the south bridge. The upper slot is connected via PCIe 3.0 x4, the lower one only with PCIe 2.0 x4. However, there is a restriction, if the lower M.2 slot is used, the lower PCIe 16x can no longer be used. The two slots share the PCIe 2.0 x4 connection.
Also the two PCIe 2.0 x1 slots PCI_E3 and PCI_E5 share the lanes, only one of them is usable.
5. BIOS, benchmark and results
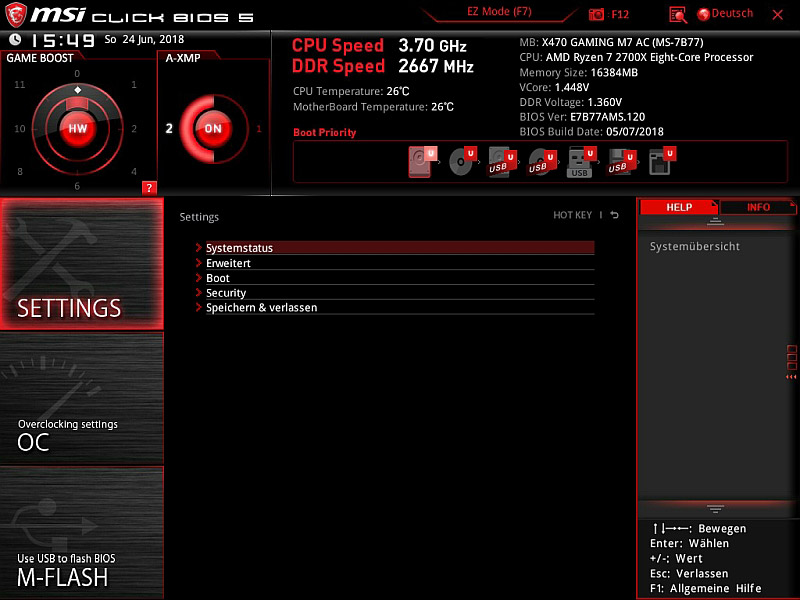
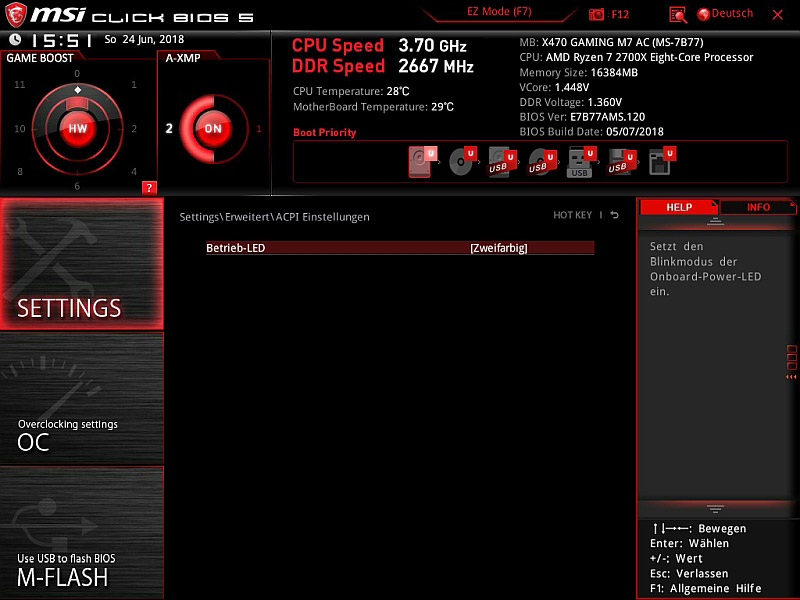
Now we come to the heart of the board and have a look into the BIOS, which we get into by pressing the Del key while booting.
At first sight you can see a very tidy and clear UEFI interface here. Of course the BIOS was flashed to the newest version 1.20.
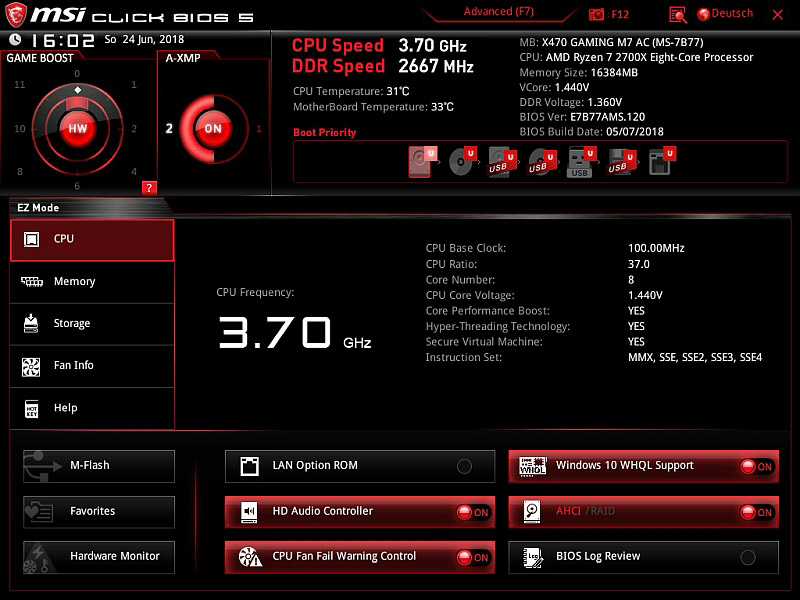 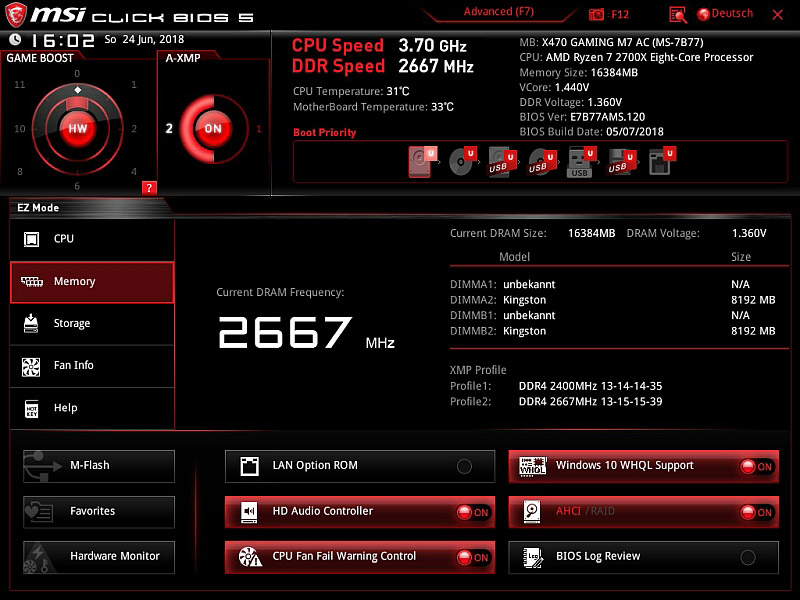 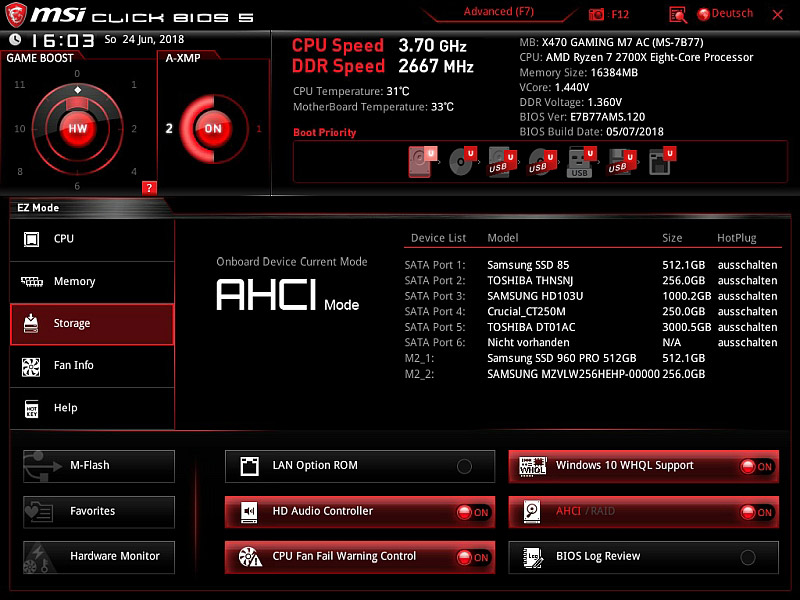 
Even if it is "only" the normal menu, you can set almost everything you need here.
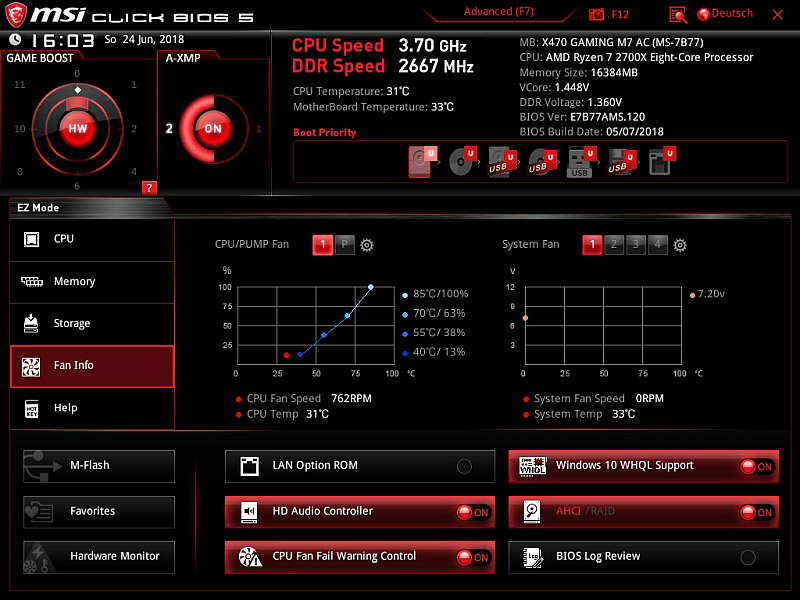
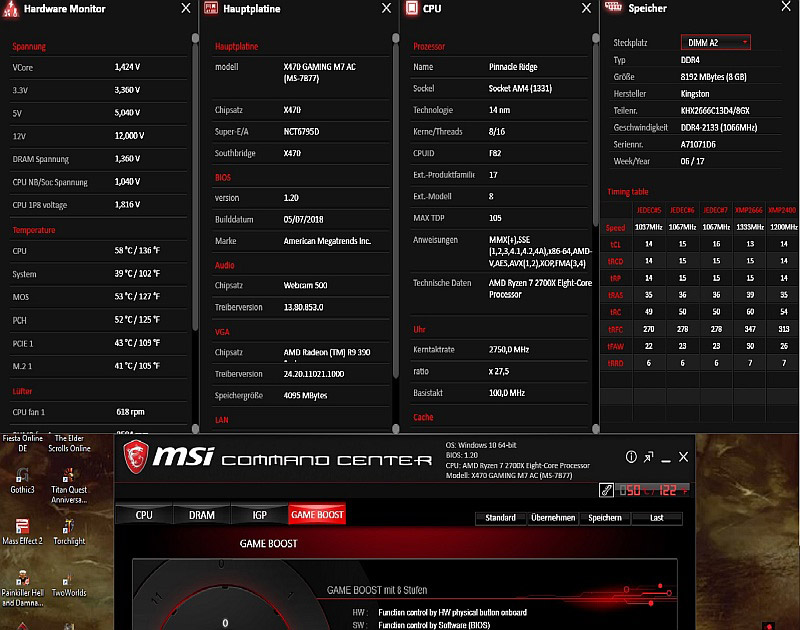
Of course the hardware monitor is also available in the entry menu.
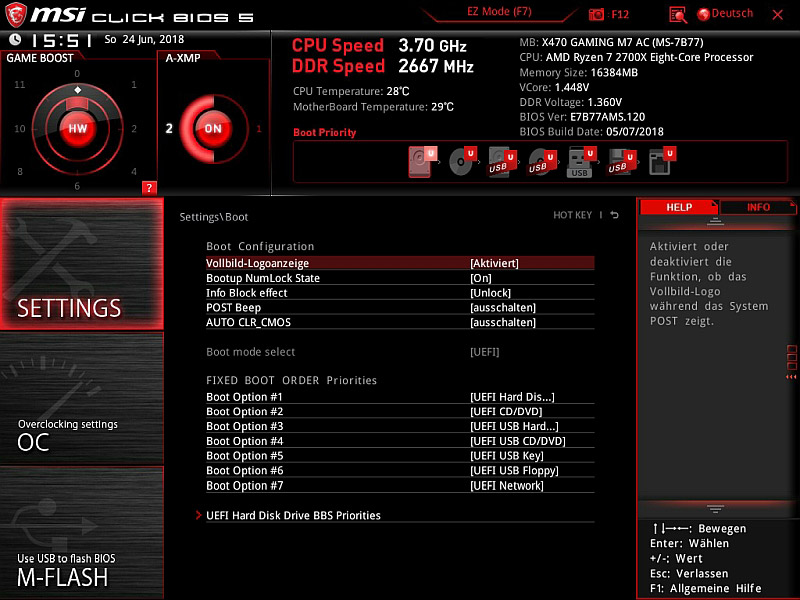
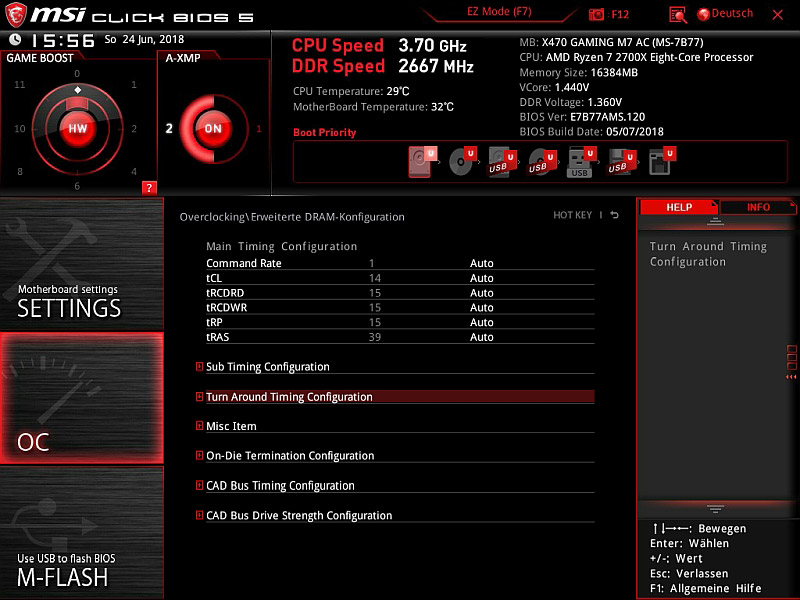
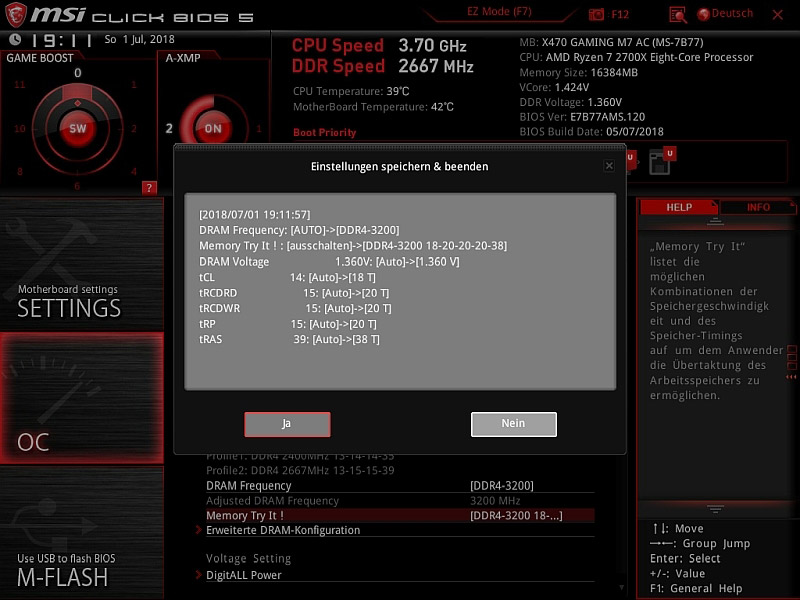
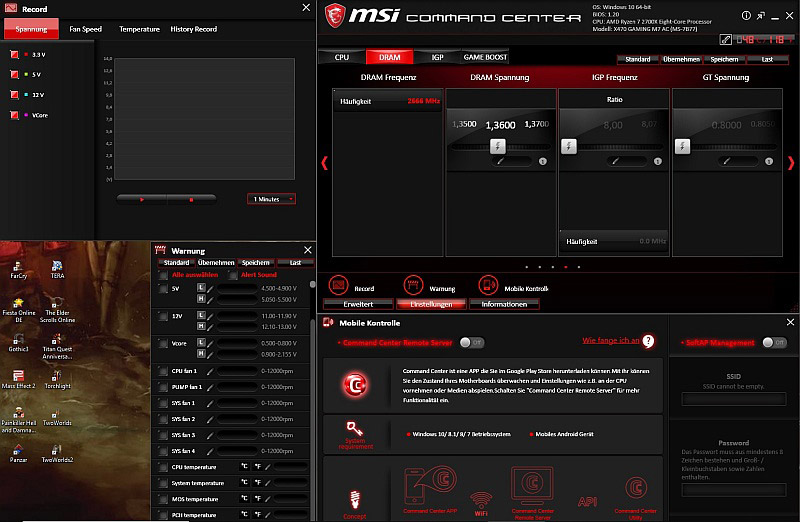
Now we come to the Advance Menu, which can be reached by pressing F7. Here the heart of the overclocker opens and you can find any settings you need to get the last bit of power out of your processor. Loading and saving your OC profiles is of course also possible here, you can easily store them on a USB stick and of course load them again.

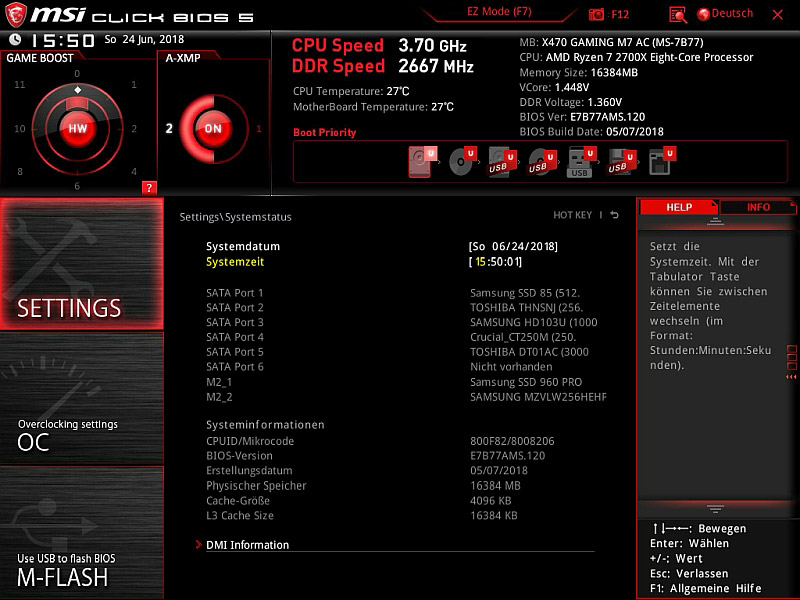
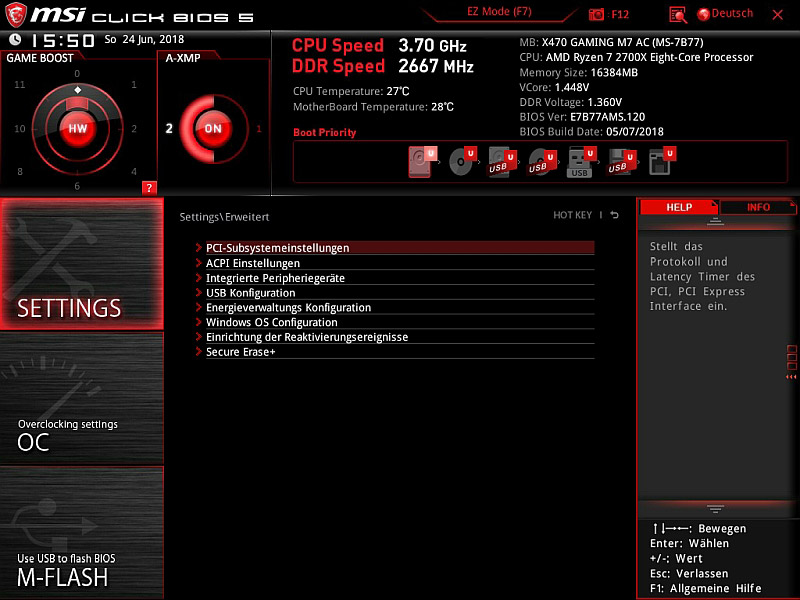
In the settings you can find all important system settings, energy saving modes, Windows settings, etc.
      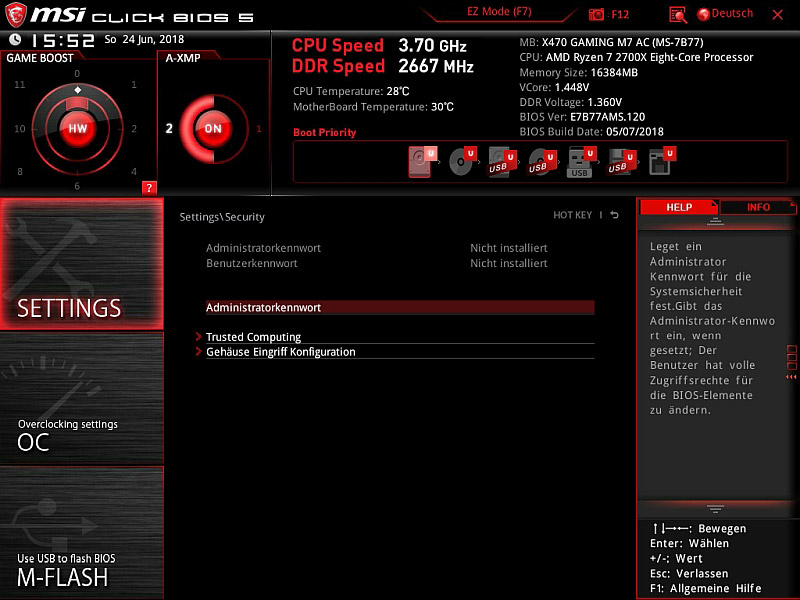 
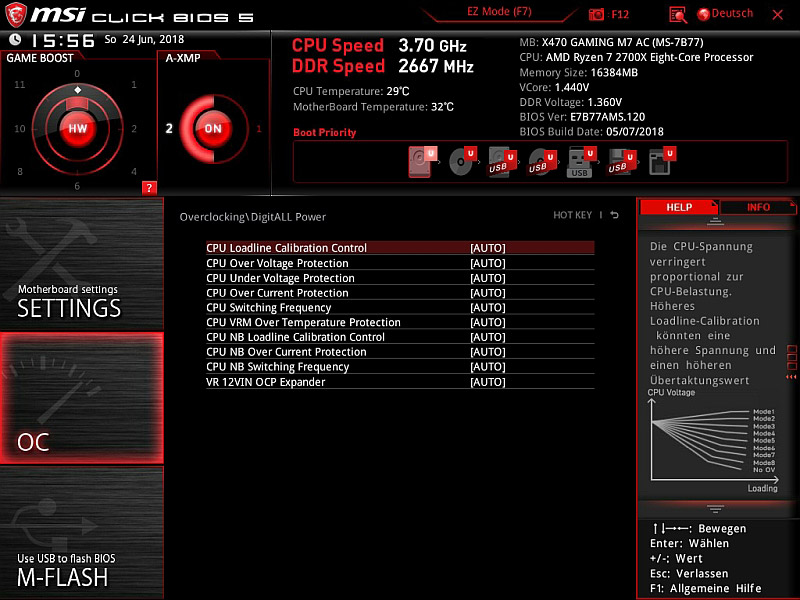
Now we come to the OC tab. Here you will find the most important settings for successful overclocking. Here the Overclockers heart opens, because there is hardly a setting that cannot be changed. Of course you should know exactly which switches are active and how.
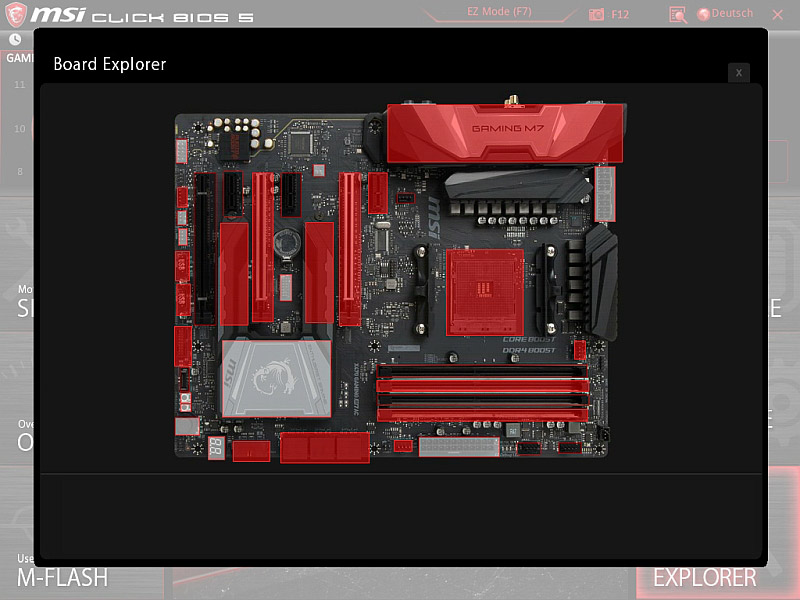
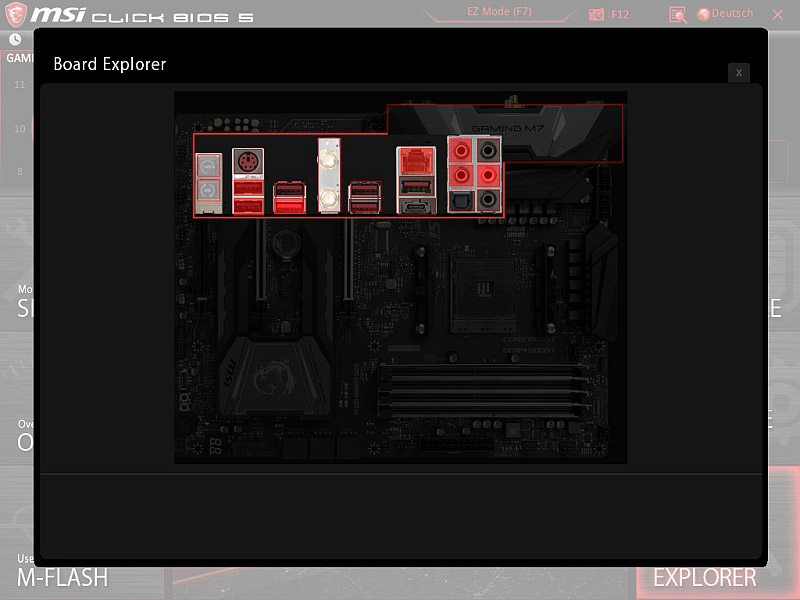
Additionally there is the Board Explorer. The marked red areas are the occupied slots/connections.
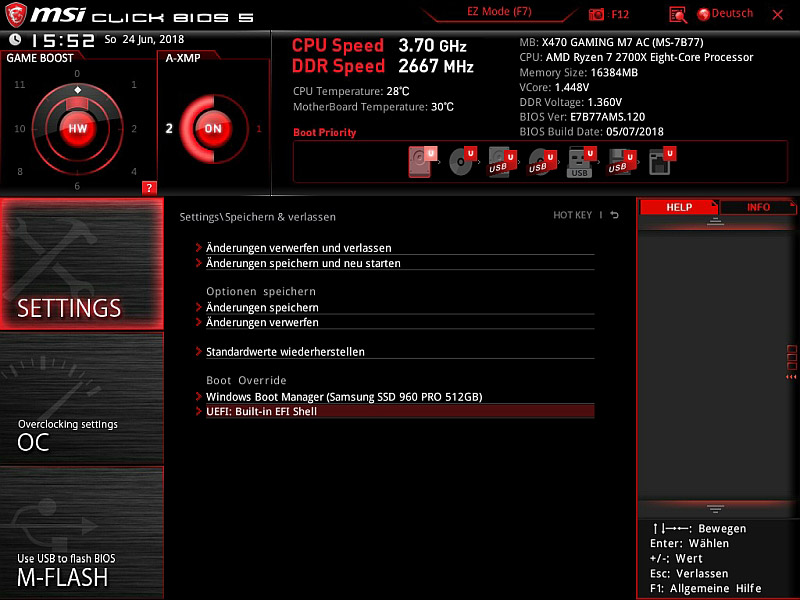
When closing the UEFI BIOS we get a detailed overview of the changes, which I really liked.
Let us now move on to the test setup and the test.
The complete system is installed in a AeroCool Project7 P7-C1 with the following hardware:
CPU: AMD Ryzen 7 2700X
CPU Kühler: Cryorig R1 Universal
RAM: 2x8GB HyperX Savage PC2666
GPU1: Sapphire R9 390X Nitro 8GB
GPU2: Sapphire R9 390 Nitro 8GB
M.2 SSD: Samsung 960Pro 512GB
M.2 SSD: Samsung PM961 256GB
SSD: Samsung 850 Pro 512GB
SSD: Crucial MX200 256GB
SSD: Toshiba Q Pro 256GB
HD: Samsung F1 1TB
HD: Toshiba A300 3TB
BS: Windows 10 HP 64bit
Since the board is quite well equipped and the Cryorig R1 Universal is a big chunk, you can't see much of the board anymore.
The previous X370 XPower Gaming Titanium with the Ryzen 7 1800X had to be replaced by the MSI X470 Gaming M7 AC with the Ryzen 7 2700X. The replacement was unspectacular and there was no friction with drivers. All drivers for the new board were integrated and unnecessary drivers were uninstalled before.
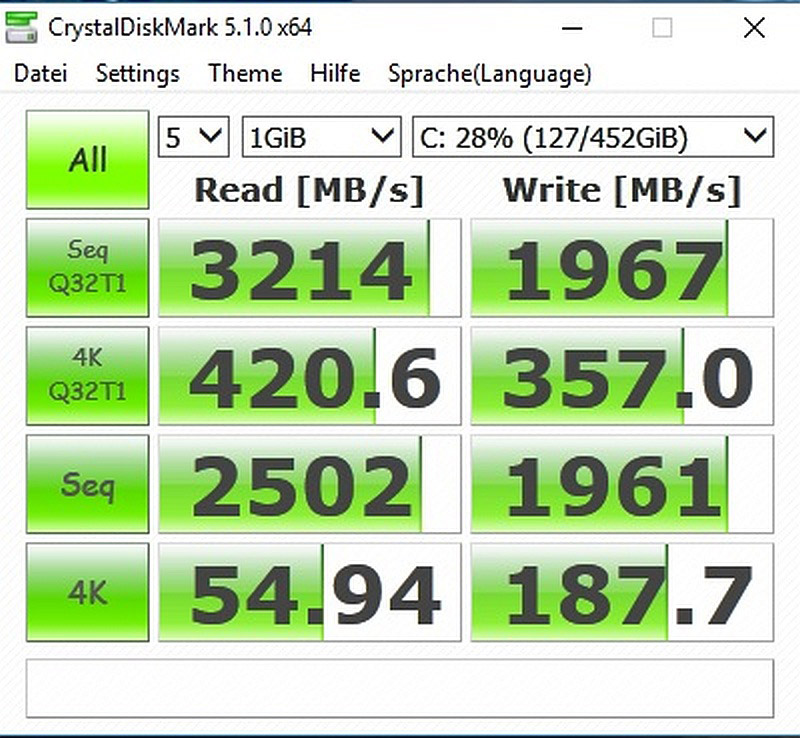
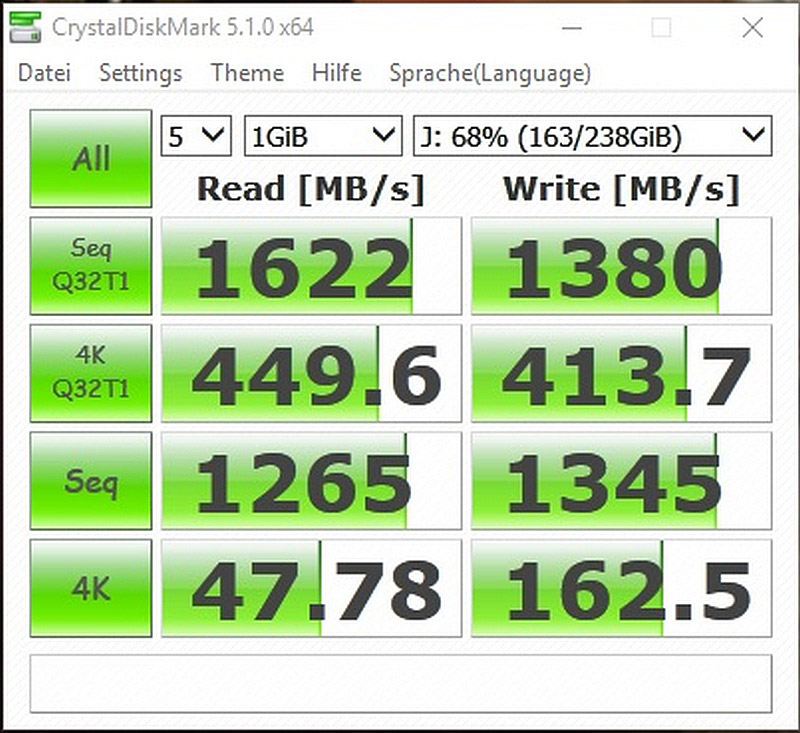
Using Crystal Disk Mark I have now checked the two M.2 slots as well as SATA for their performance.
First the Samsung 960Pro in the upper M.2 slot which is connected via PCIe 3.0 x4.
Now the Samsung PM961 in the lower M.2 slot which is connected via PCIe 2.0 x4.
Last but not least, the Samsung 850Pro is connected via SATA.
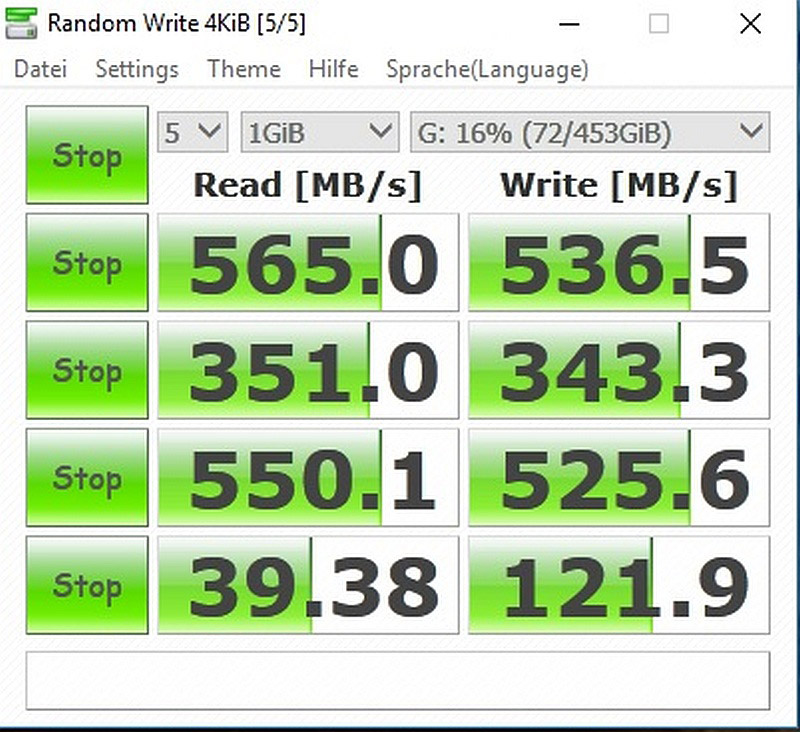
We see here exactly the performance you can expect from the SSDs. So everything is in the green here
Next, of course, the overall performance of the system has to be put to the test, which I tested with PCMark 10.
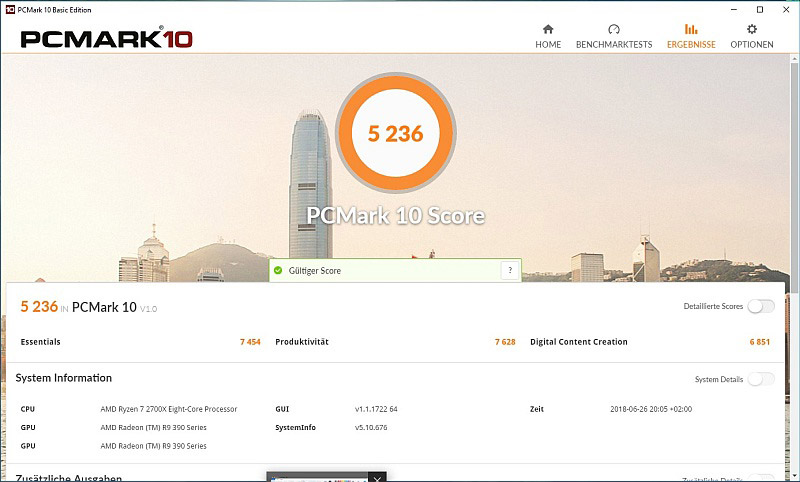
You won't be disappointed here either. The Ryzen 7 2700X harmonizes perfectly with the MSI X470 Gaming M7 AC. In contrast to the old system with the X370 XPower Gaming Titanium and Ryzen 7 1800X, the system performance has increased by more than 350 points. Of course, the Ryzen 7 2700X should have the biggest share of this.
Of course, a short WLAN throughput test should not be missing here and we won't be disappointed. Nominal is a throughput in the 5GHz range of a good 867 Mbit/s and the WLAN card also connects to it. The complete process is handled by the Telekom Speedport Smart, which achieves up to 1700 Mbit/s over 5GHz.
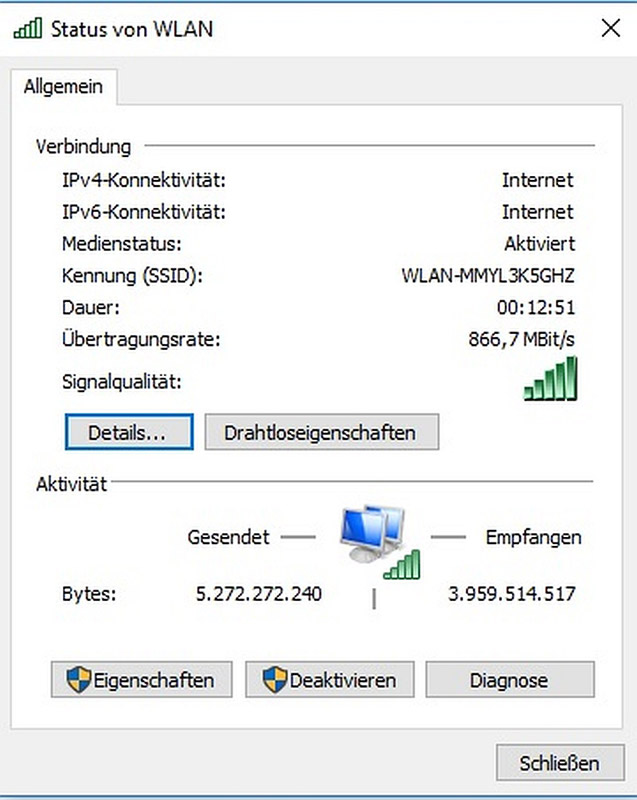
Copying a 3GB file thus went very fast with a good, average 60MB/s, which makes a throughput of 480Mbit/s a good deal.
Unfortunately, this is still a long way away from the promised 867 Mbit/s, but in my opinion fast enough. It comes here in addition that I receive here unfortunately 5 strange 5GHz networks and over 20 in the 2.4GHz range. A disturbance can therefore not be excluded.
Likewise the integrated Bluetooth works smoothly, devices are recognized and connected perfectly.
6. Software
Now let's have a look at the attached software. First the MSI App Manager.
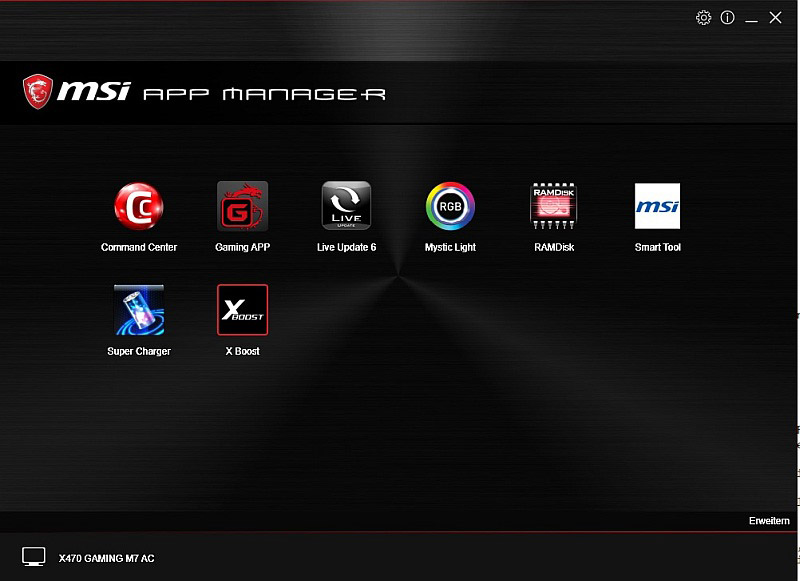
The App Manager is basically just a list of the installed apps, which can be started and updated here directly.
The MSI Command Center already looks different. It's the heart of the motherboard overclocking feature.
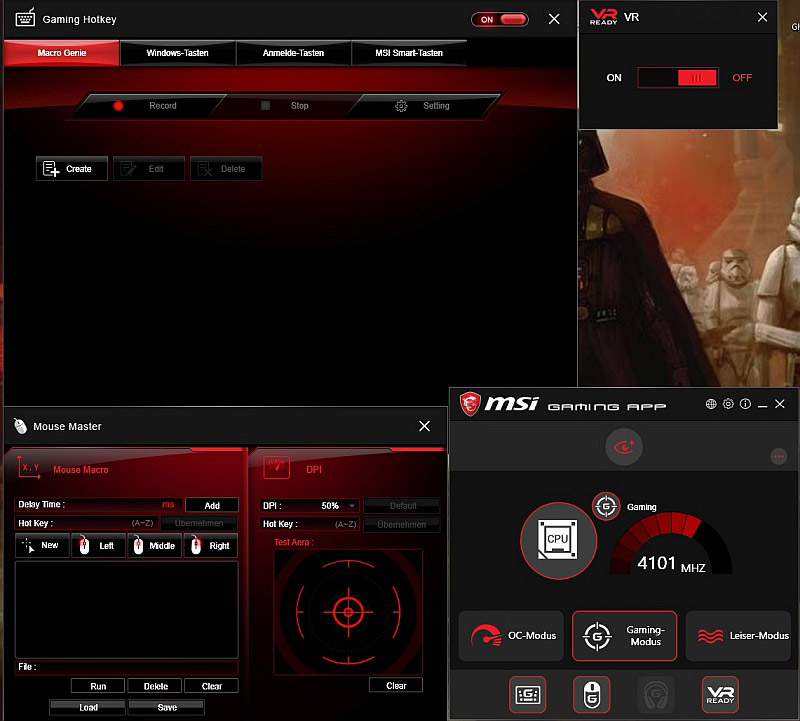
Now the MSI Gaming APP. In this APP special gaming settings can be made, such as an overlay in which some monitoring information or the frames per seconds in the game can be displayed.
Beside the Command Center there is also the XBoost App. With this app you can start some profiles and optimize your computer for certain types of applications, like gaming or video.
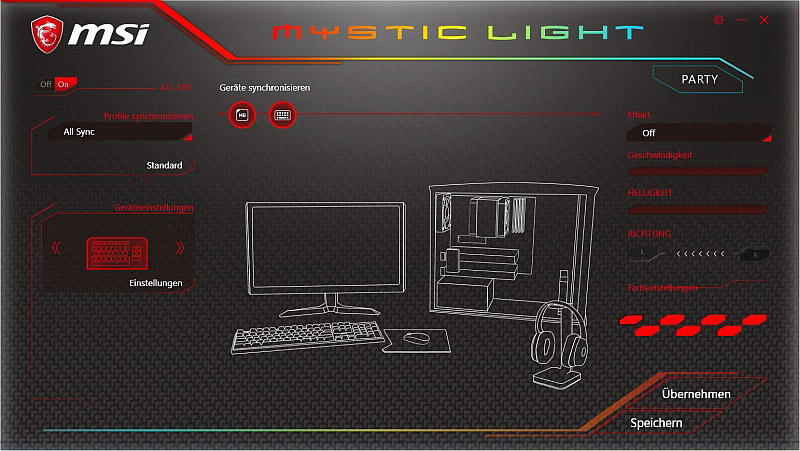
To control the RGB lighting there is the MSI Mystic Light App. Here you can configure and synchronize all compatible devices. In my case the motherboard and my GSKILL RIPJAWS KM780 are synchronized, but my Logitech G903 and the Logitech Powerplay mouse pad are ignored. Which I think is a pity.
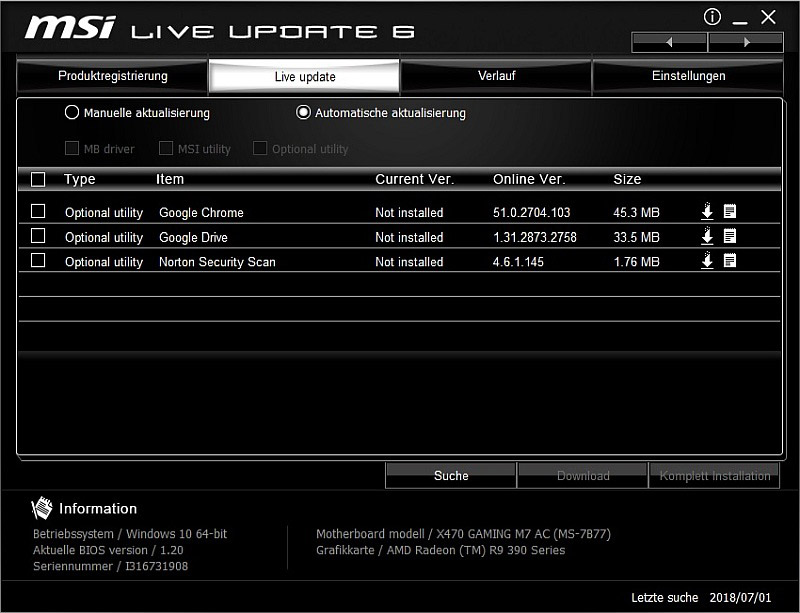
Next is the LiveUpdate App. Here you can set if the apps are automatically updated or if you prefer to search manually from time to time. The same applies to the BIOS, of course. I was not offered BIOS 1.20 via the update function, although it was already available for some time on the servers and on the support page.
Additionally you can "tune" your sound. MSI has connected to the Realtek HD audio chip in connection with the Nahimic 2+ audio software. Under Audio you can use various preset profiles, for various different games such as MMO or Rally, etc., as well as the settings for the microphone. For streamers there is also the function HD Audio Recorder 2, by means of which gamepad or keyboard keys for various sounds can be adjusted.
Then there is the point Soundtracker at the end. Here you can fade in a kind of tracker as an overlay for certain games, which shows the direction of opponents on the basis of certain sound information. Unfortunately, only very few games are supported here, none of which I own except The Wichter 3. With The Wichter 3 this makes no sense at all. With the Hexer sense I also know where enemies are and see them in the Minimap.
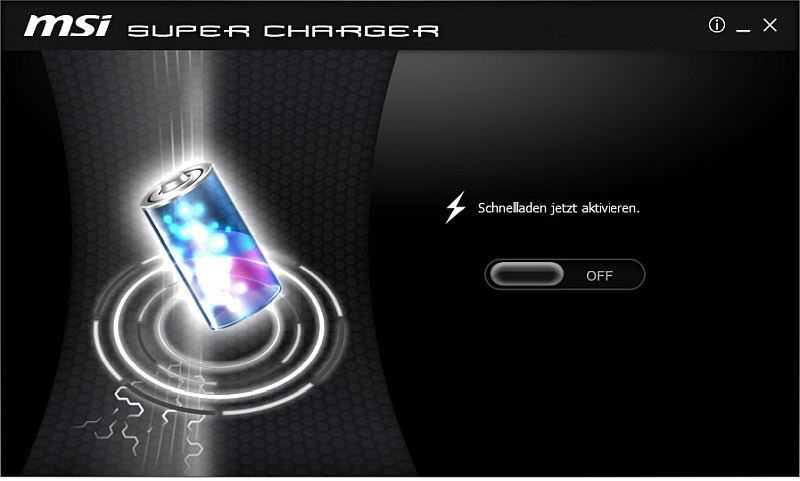
There is also the MSI Super Charger, which unfortunately only works with Apple devices.
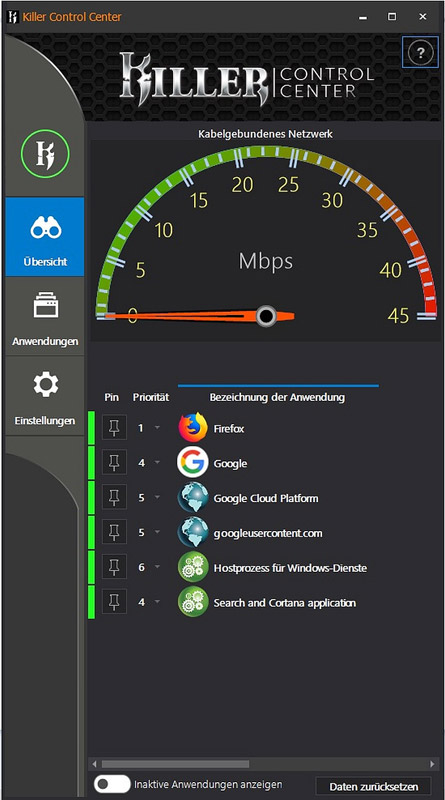
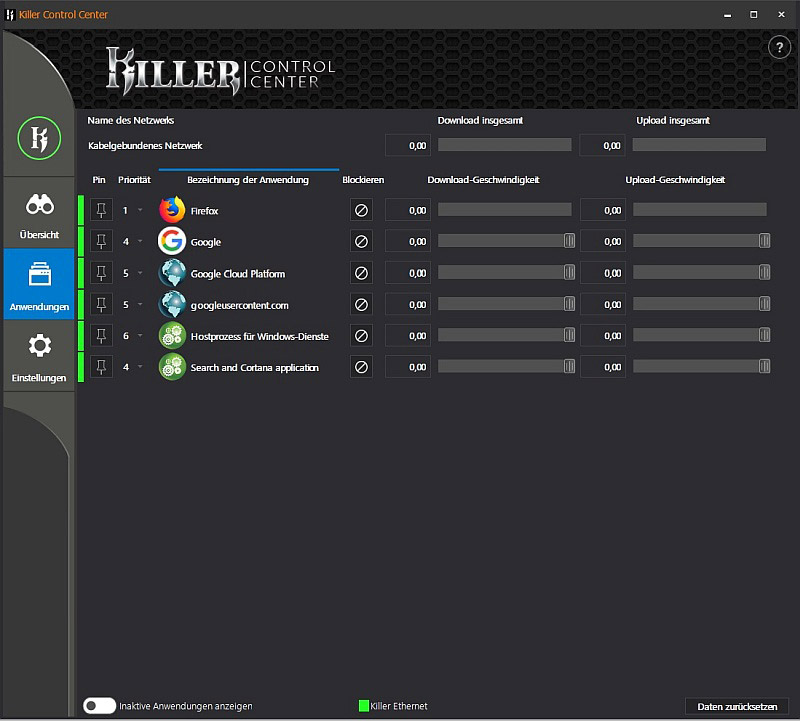
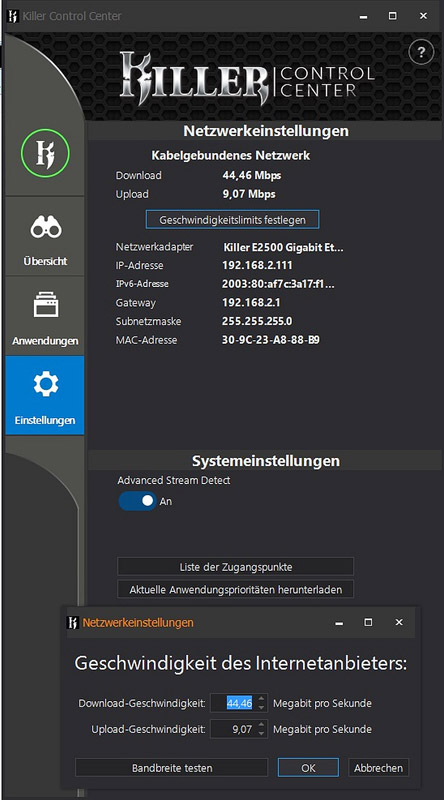
Finally we come to the Killer Control Center App. With this program you prioritize the accesses to the LAN. For example, you can give online games a high priority, so that a suddenly running update doesn't rob your bandwidth and produces lags or increases the ping. The Killer hardware does this smoothly and much easier than the MSI LAN App, which I already criticized with the X370 XPower Gaming Titanium. Thanks to MSI for changing this again.
7. Conclusion
Again, MSI has managed to develop an outstanding motherboard for the AMD Socket AM4 that really leaves nothing to be desired. Scope of delivery, processing and also the design as well as the equipment are faultless.
The return to the Killer LAN is absolutely welcome and the price of about 240 Euro for the MSI X470 Gaming M7 AC is absolutely reasonable. I have the computer in such a way now somewhat over one week in the continuous stress and there were here no disturbances in the form of BSOD or similar error messages.
I would be very happy if you would also visit my Youtube Channel. There I stopped the unpacking of the MSI X470 Gaming AC. Please leave a constructive comment there, no matter if positive or negative!
MSI X470 Gaming M7 AC YouTube
I hope very much that you liked my contribution and am pleased naturally also here about constructive comments or criticism.
Here you can buy the MSI X470 Gaming M7 AC motherboard. *Ad
Continue to our hardware reviews area or directly to reader reviews with lots of more reviews ...
Write your own user review?
Get to the user review registration 
|


