-- Veröffentlicht durch ocinside am 14:37 am 23. Aug. 2017
Again, many thanks for your great reader review :thumb:
-- Veröffentlicht durch Berserkus am 14:36 am 23. Aug. 2017
MSI X370 XPower Gaming Titanium Reader Review
- Introduction
- Package contents
- Technical data
- Layout, design and features
- BIOS, tests, and benchmark
- Software
- Conclusion
1. Introduction The
Today I test the MSI X370 XPower Gaming Titanium motherboard for you - thanks to the MSI test-IT action.
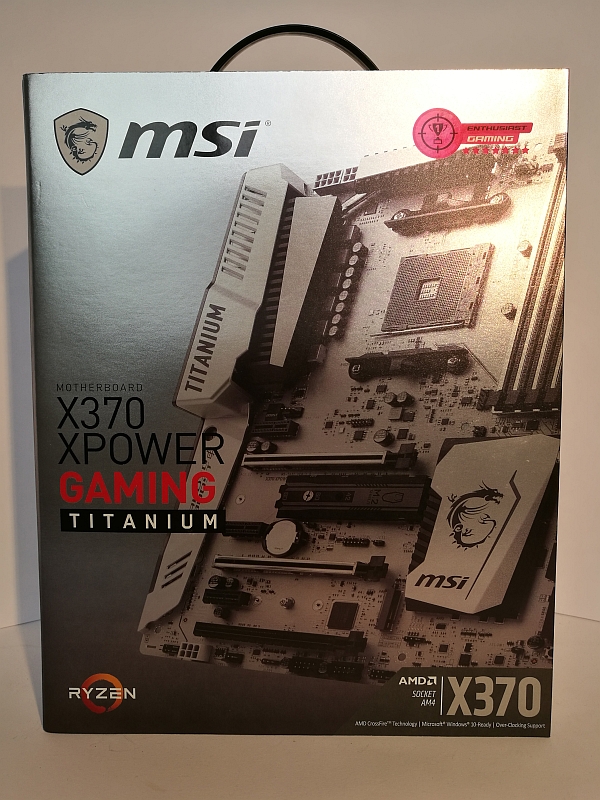
For this, we will now have a closer look at the board. First we see a very noble packaging.
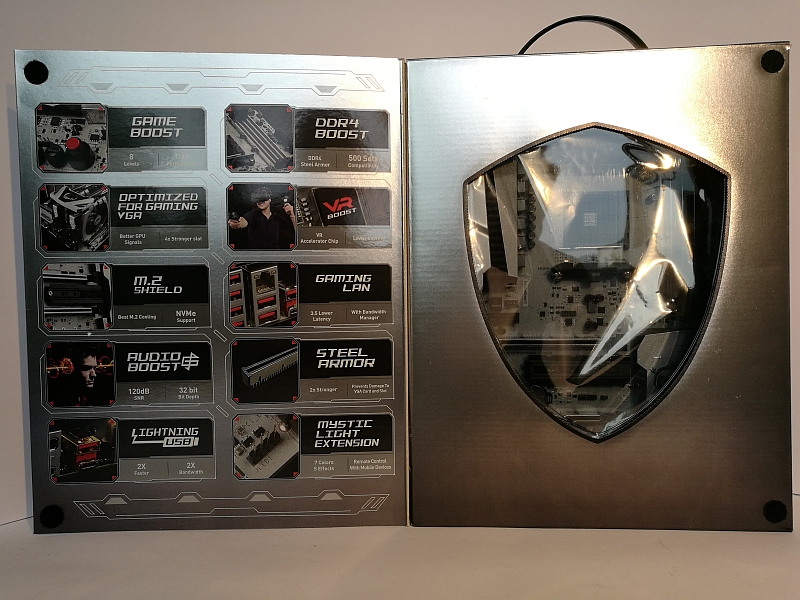
You can also fold up to watch the board behind a plastic screen.
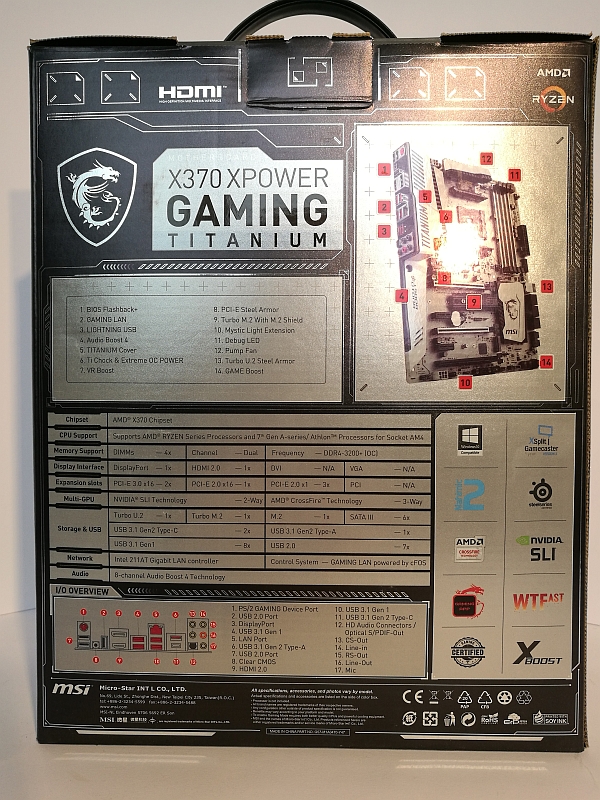
On the back we see the more details of the connections and equipment of the motherboard.
2. Delivery The
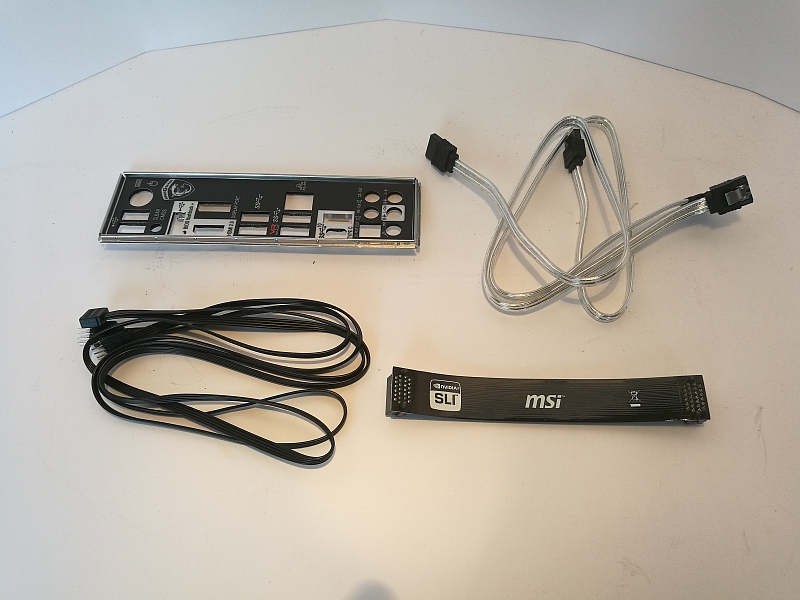
The delivery is very economical, I had actually expected much more.
The delivery contains only:
1x slot bracket
2x SATA cable
1x MSI Mystic Light connection cable for RGB stripes.
1x Nvidia SLI bridge
1x high gloss overview of motherboard with detailed description.
1x installation DVD
1x labeling sticker for cables
1x manual
1x Quick installation guide
1x Instructions for RAM and cooler installation
Here're the accessories:
The motherboard overview folder:

The enclosed instruction manual, the quick installation guide, the installation DVD, the stickers and the warranty card.
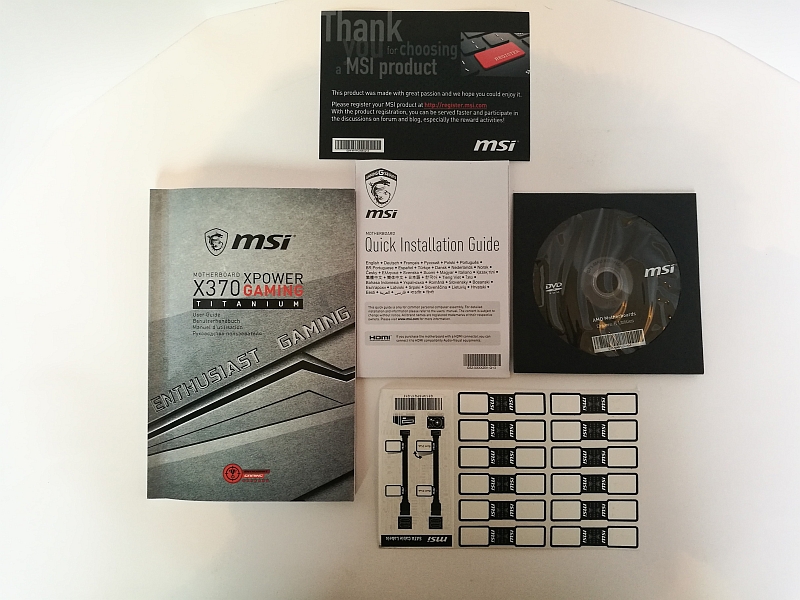
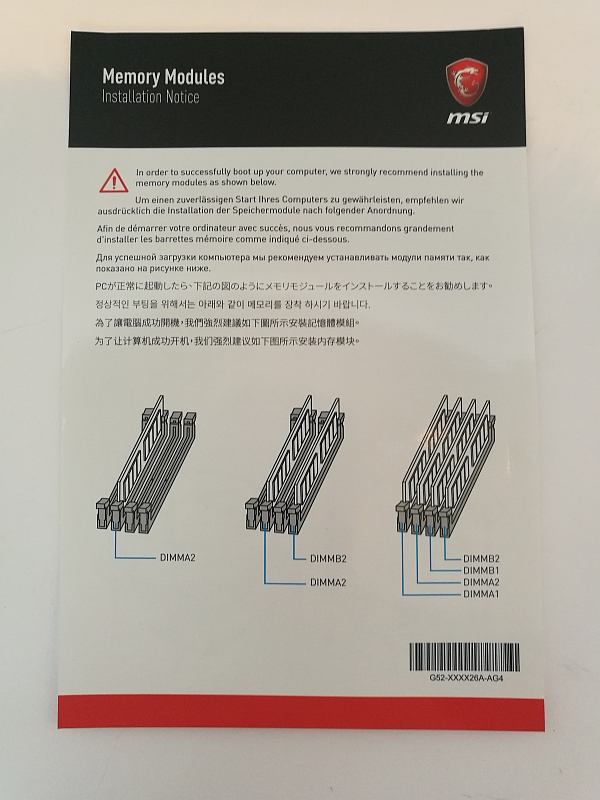
The RAM installation instructions:
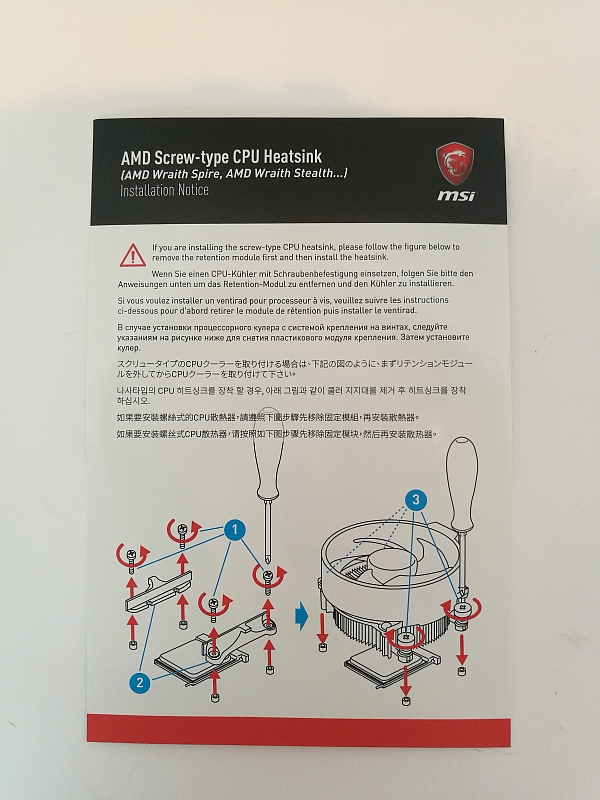
And, of course, the instructions for the cooler mounting must not be missing:
Here I would have desired that at least one slot bracket with 2x USB 2.0 and 2x USB 3.0 connections would have been included.
3. Technical data
Let's get to the technical data:
- X370 XPOWER GAMING TITANIUM
- CPU support: AMD RYZEN series processors and 7th Gen A series / Athlon processors for AM4 socket
- CPU: Socket AM4
- Chipset: AMD X370 chipset
- Graphics Interface 2x PCI-E 3.0 x16 Slots + 1x PCI-E 2.0 x16 Slot
- 2-way SLI / 3-way CrossFire
- Display Interface DisplayPort, HDMI
- Memory support 4 DIMMs, Dual Channel DDR4-3200 (OC)
- expansion slots 3x PCI-E x1 slots
- SATA / M.2 / U.2 6x SATA 6Gb / s ports, 2x M.2 slots
- USB 3.1 Gen2 3x USB 3.1 Gen2 (Type A + C)
- USB 3.1 Gen1 8x USB 3.1 Gen1
- USB 2.0 7x USB 2.0
- LAN Intel 211AT Gigabit LAN
- Audio 7.1-Channel High Definition Audio with S/PDIF
- Form Factor ATX
The features according to MSI:
- Supports AMD RYZEN / A series processors of the 7th generation and Athlon CPUs in the AM4 socket
- Supports DDR4-3200 MHz memory, (A-series / Athlon max 2400 MHz), max. 64GB
- DDR4 Boost with SteelArmor: The performance boost for your DDR4 main memory
- VR Ready and VR Boost: Best Virtual Reality experiences without latencies
- OC features: OC Genius, OC Essentials, Game Boost, OC profiles
- Mystic Light Sync: Synchronization with external RGB devices controlled by GAMING APP.
- Mystic Light Extension: Connect and control external LED light strips.
- Ultra-fast Gaming: Twin Turbo M.2, Steel Armor, M.2 Shield, Turbo U.2, Lightning USB 3.1 Gen2
- AudioBoost 4 with Nahimic 2: Excellent sound in studio quality
- Intel GAMING LAN with LAN Protect: Lowest latencies and effective bandwidth management
- BIOS Flashback + Easy BIOS Recovery without CPU / memory / graphics card
- Military Class 5 and Guard-Pro: High quality components for high safety and efficiency.
- MULTI-GPU with SteelArmor PCI-E slots. Supports NVIDIA SLI & AMD Crossfire
- In-game tools: Game Boost, GAMING Hotkey, X-Boost, Xsplit Gamecaster
- EZ Debug LED: simplest troubleshooting
- Click BIOS 5 with scalable high-res display, favorites and search function
- GAMING certified for 24-hours on- and offline gaming, tested by eSports professionals.
4. Layout, design and features
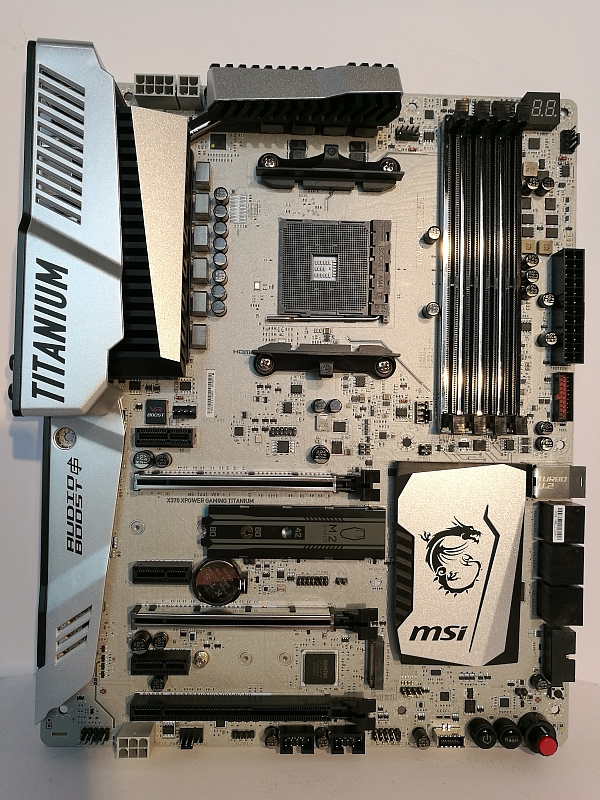
The MSI X370 XPower Gaming Titanium is a board designed in classic ATX form factor. Important for the overclocking is that it gets stable power! The board has not only an 8-pin power connector but also a 4-pin connector, which guarantees the power for high overclocking. These connections are found in the upper left corner of the VRMs.
The Titanium coloring looks exceptionally noble and high-quality. With the distribution of the components everything is in its usual place, there are no surprises.
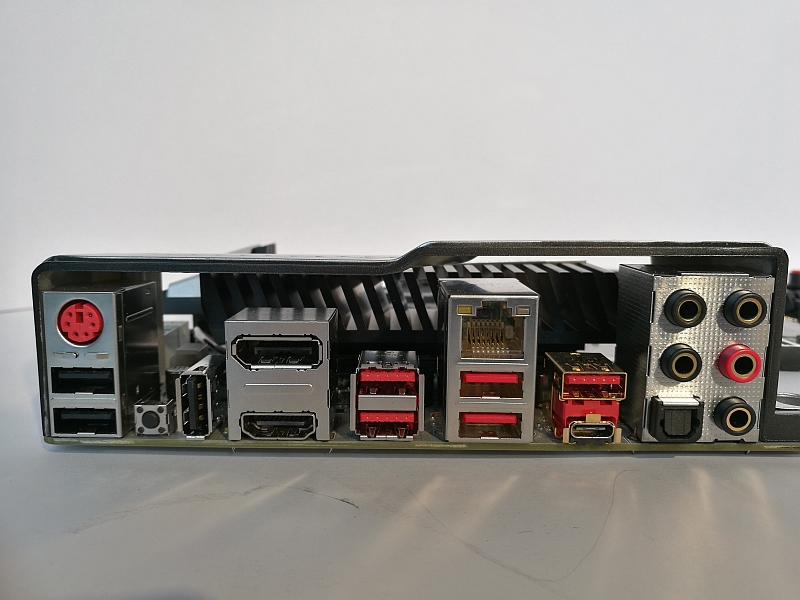
The rear I/O panel is very well equipped with:
- 2x USB 2.0 ports
- PS / 2 GAMING Device Port
- Clear CMOS Button
- 1x USB 2.0 BIOS FLASHBACK +
- HDMI 2.0
- DisplayPort
- 2x USB 3.1 Gen1 ports
- 2x VR Ready USB 3.1 Gen1 ports
- Intel Gigabit LAN port
- LIGHTNING USB 3.1 Gen2 Type-C
- Optical S / PDIF-Out
- HD Audio Connectors
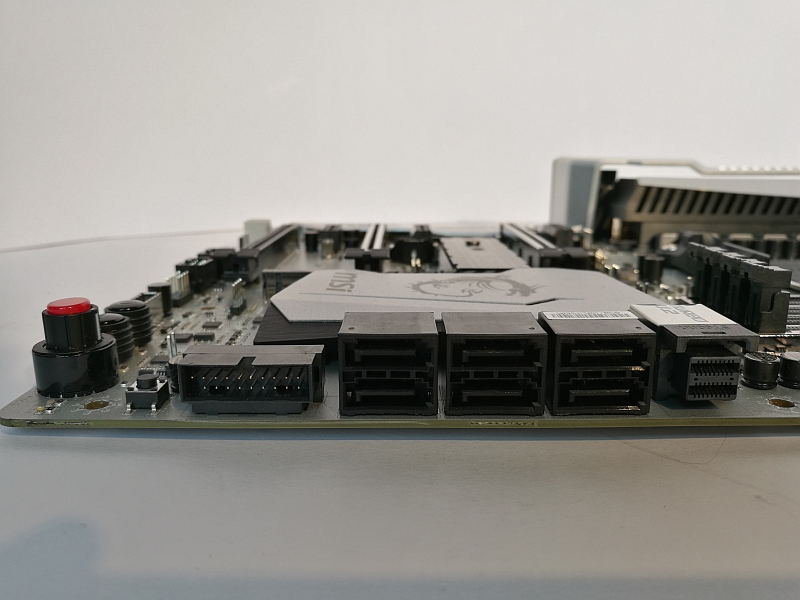
On the lower right side are the connectors for 6x SATA3, the U.2 connector and a 19 pin USB 3.0 header.
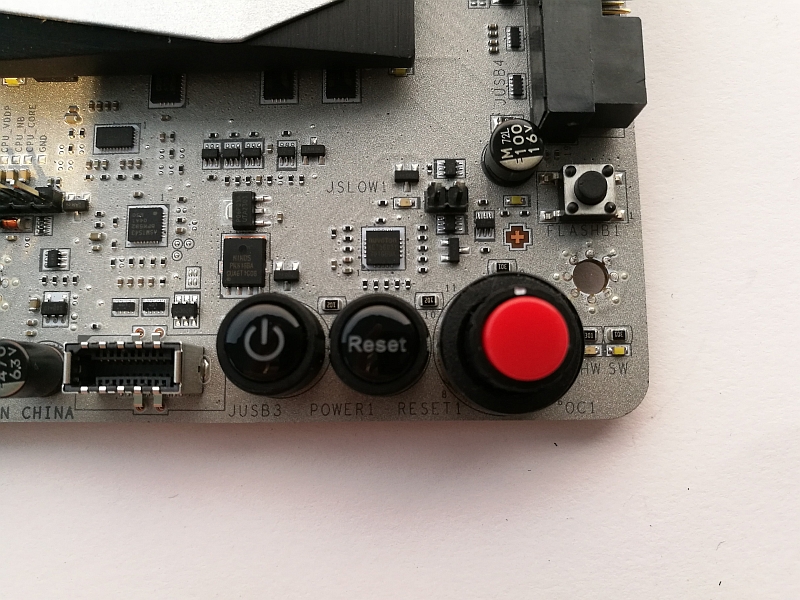
The right lower corner houses the rotary switch for the hardware overclocking, the reset button and the left an additional USB 3.1 port. In addition, a button for BIOS Flashback + and a jumper for the "Slow Mode" start.
Unfortunately, you can not use all the connectors on the board at the same time, a limitation of the PCIe lanes leads to restrictions in the M.2/U.2 SATA ports
And the PCIe 2.0 16x slot.
You can only use the following:
2x M.2 and 6x SATA
U.2, upper M.2 as SATA, 5x SATA
PCIe 2.0 16x, 2x M.2 where lower only SATA, 5x SATA
PCIe 2.0 16x, 2x M.2 both only SATA, 4x SATA
PCIe 2.0 16x, 1x M.2 upper slot, 6x SATA
1x M.2 lower slot, 1x U.2, 6x SATA
5. BIOS, Tests and Benchmark
First of all, of course, the BIOS is updated. Already, because the new BIOS AGESA 1.0.0.6 is included. Unfortunately, it's forgotten to tell the BIOS, so a readout using AIDA64 still shows the old 1.0.0.4.
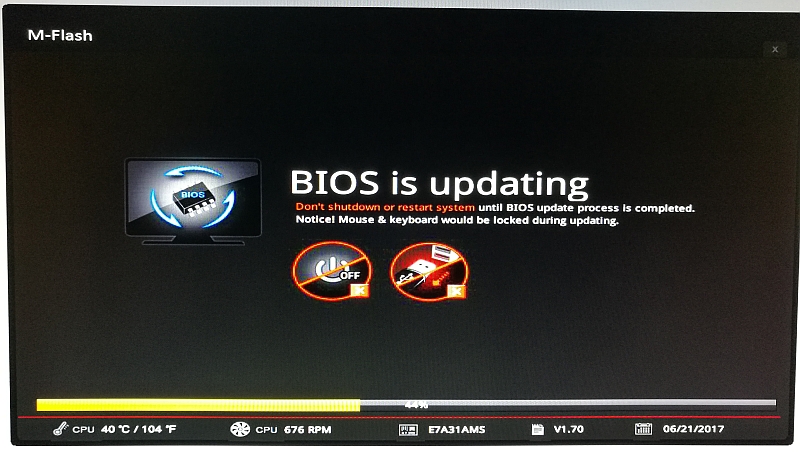
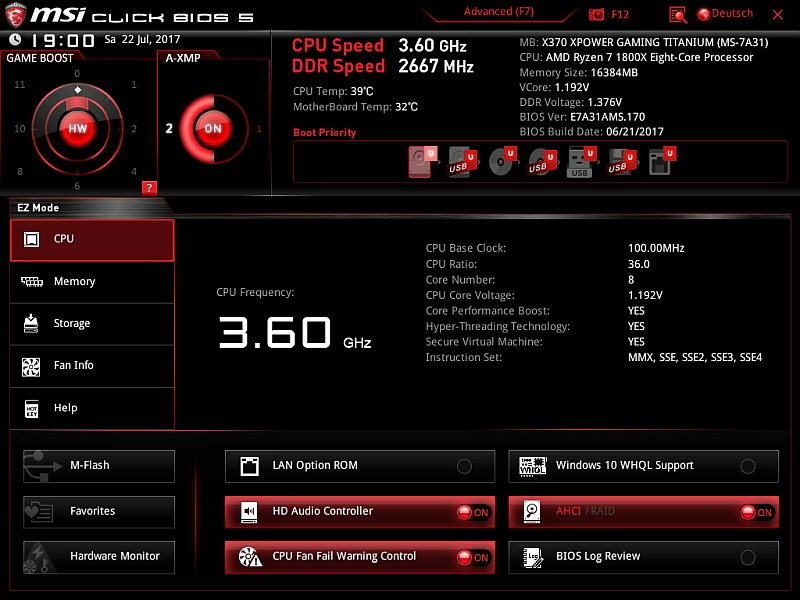
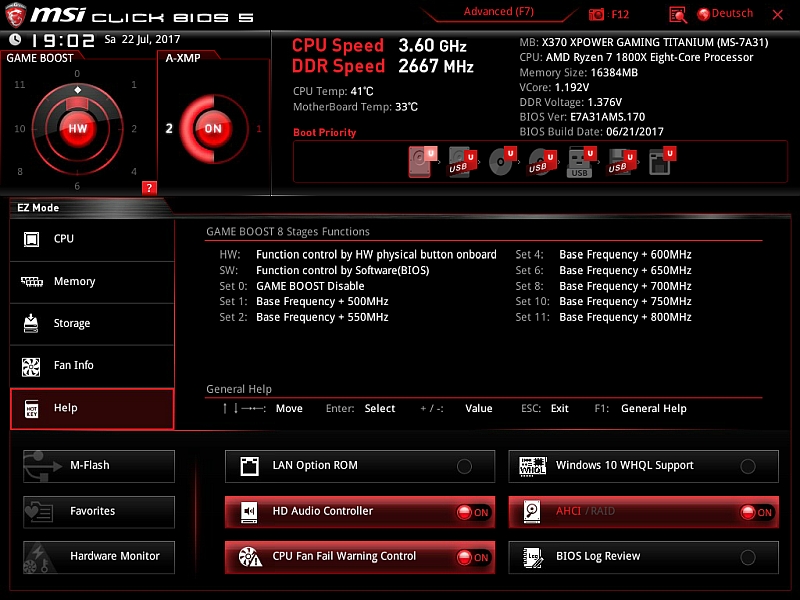
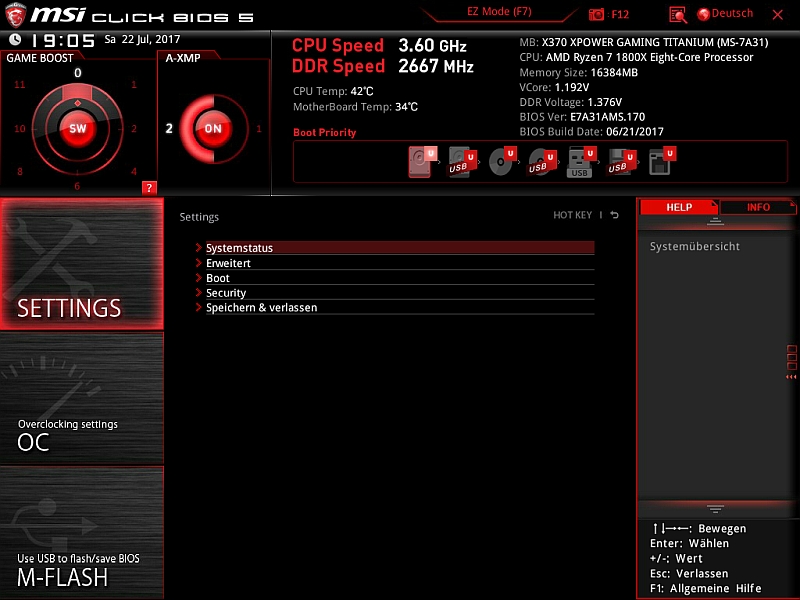
Let's go to the heart of the board and take a look into the BIOS, which we reach during booting by pressing the Del or Del button. Here you can see at first sight a very tidy and clear UEFI surface.
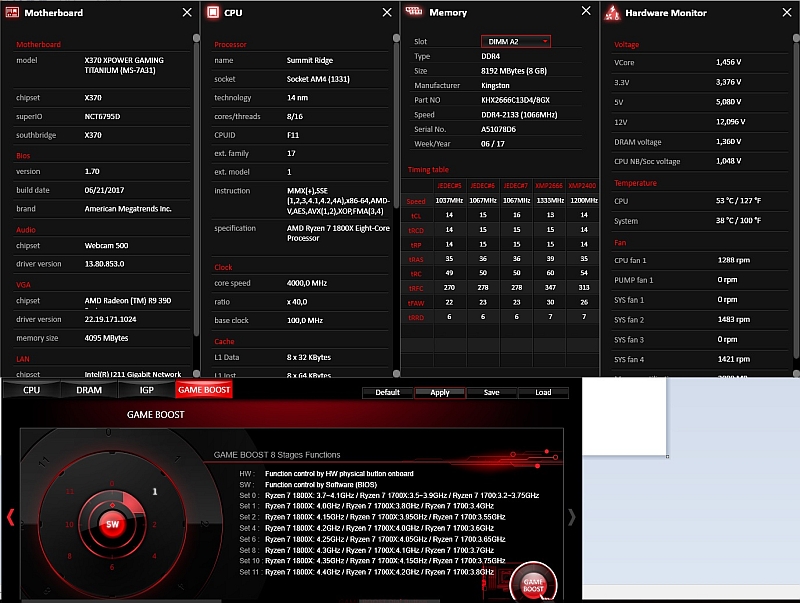
On the right side you will find mainly the information overview, broken down into CPU:
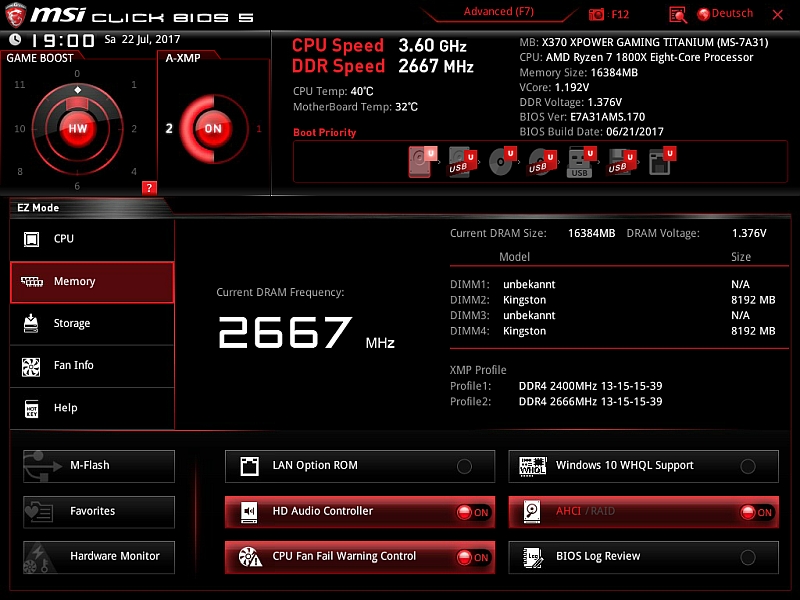
Memory:
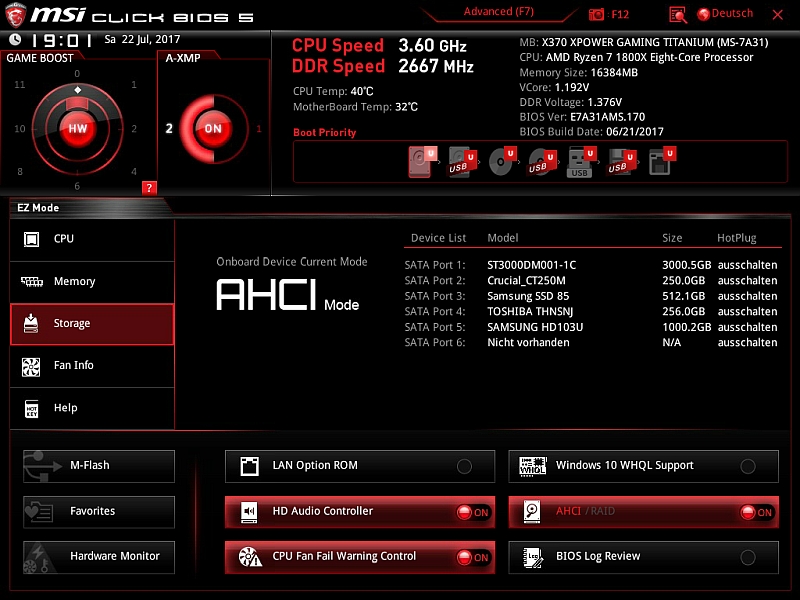
Storage:
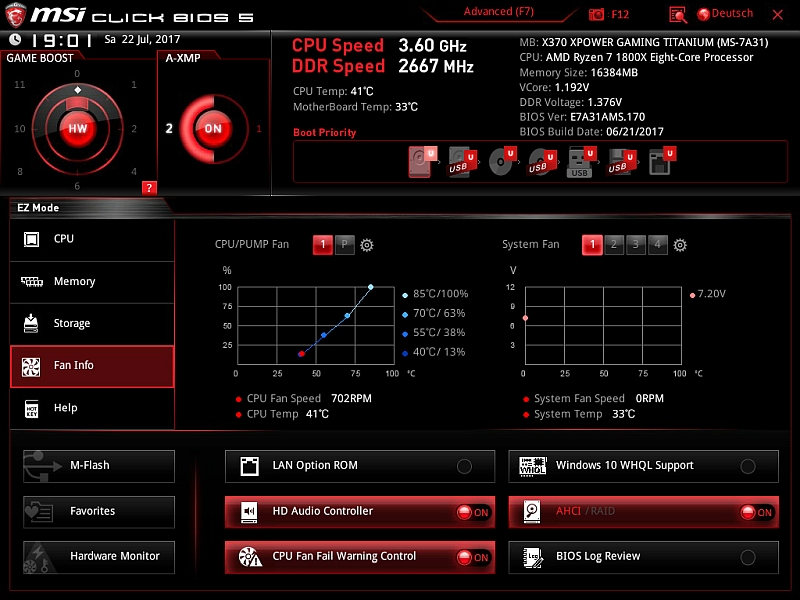
Fan Info:
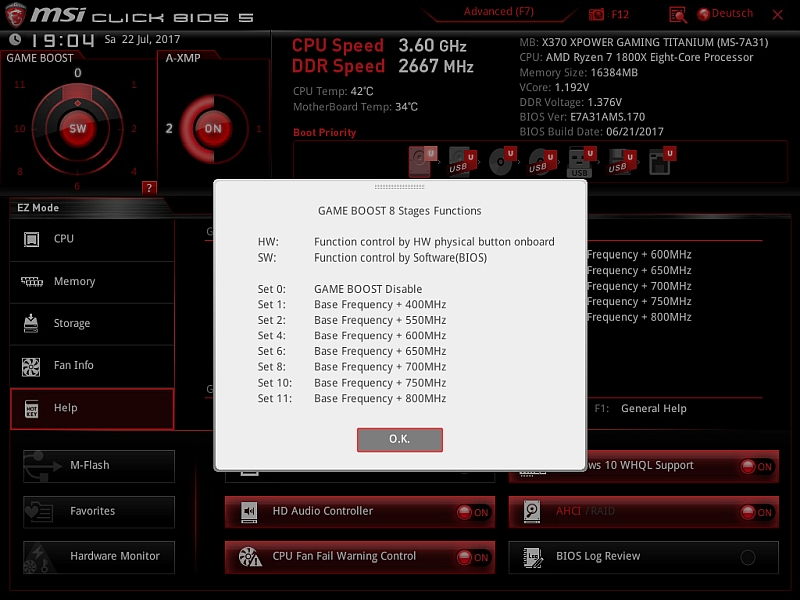
And finally the help:

You can click here directly in EZ-Mode through a variety of functions and the most important functions you have here at a glance. Even the GameBoost and the XMP profiles are accessible here.
In addition, LAN Option ROM, Windows 10 WHQL Support, Audio Controller, CPU Fan Fail Warning, AHCI and the BIOS Log Review can be activated or deactivated. Activated fields can then be seen on the first image on the red glowing button. Likewise, one can flash directly from here the BIOS and call the favorites.
A minor failure I have found nevertheless: In the description of the Gameboost is Set 1 of + 500MHz in the help 400MHz. In fact, in Set 1, the clock is only increased by 400MHz, here MSI should improve.
Here's the help:
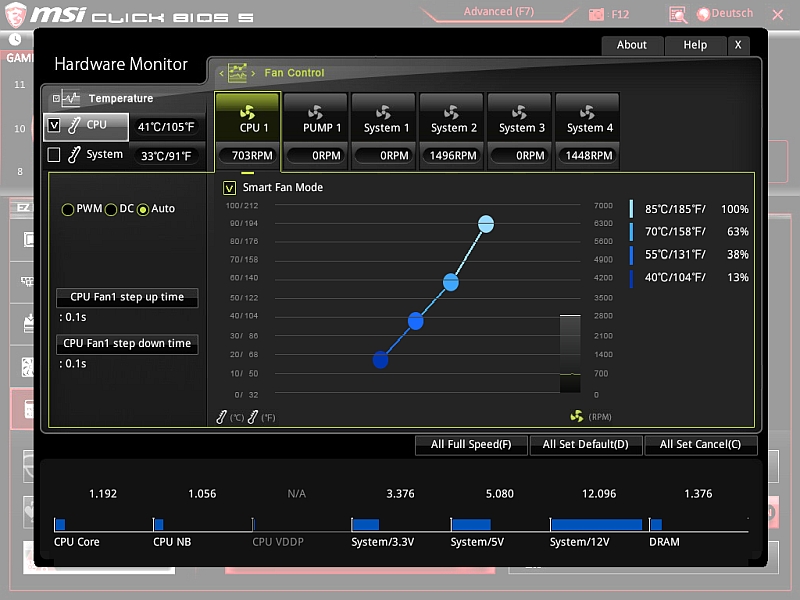
The hardware monitor is also available here.
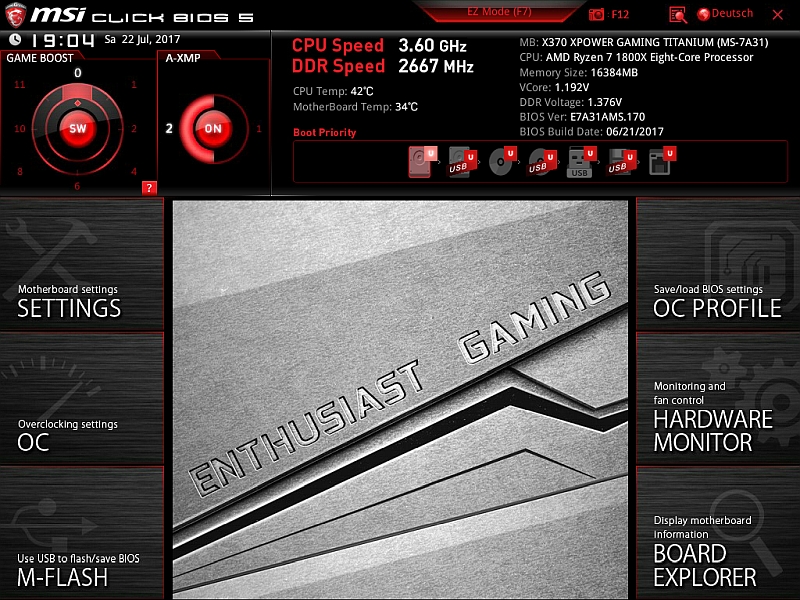
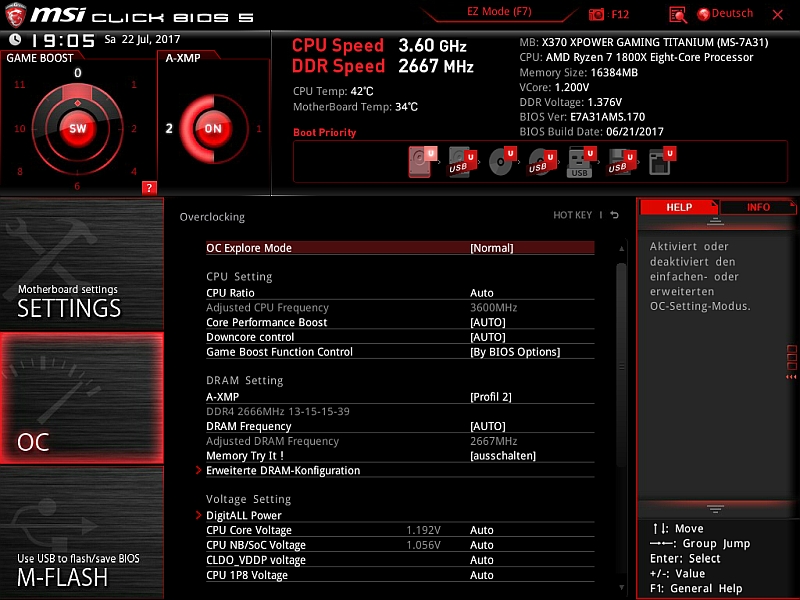
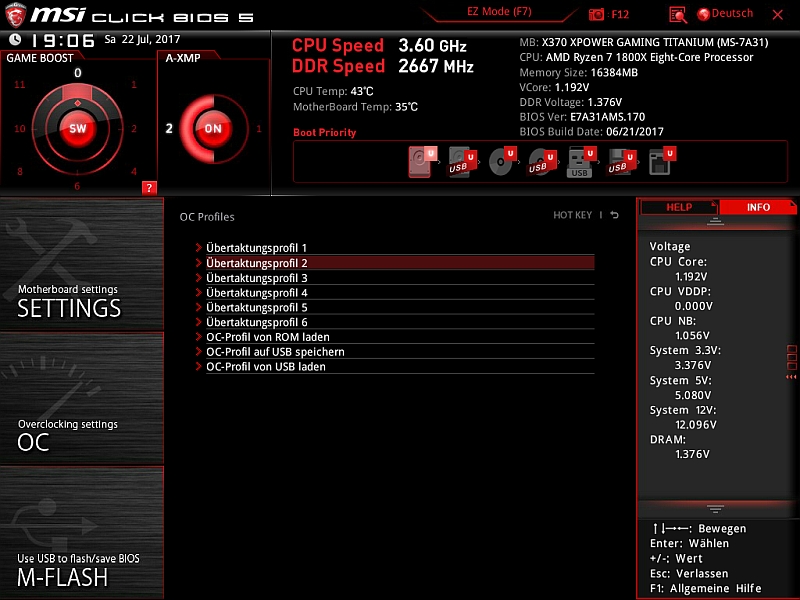
By pressing F7, we enter the Advanced menu, here you can enter your settings as you like. There are also detailed overclocking settings and the possibility to store a total of 6 OC profiles. It is also possible to save and load via the USB stick.
The overview:
Here the motherboard Settings:
Followed by the Overclocking Settings:
Overclocking Profiles:
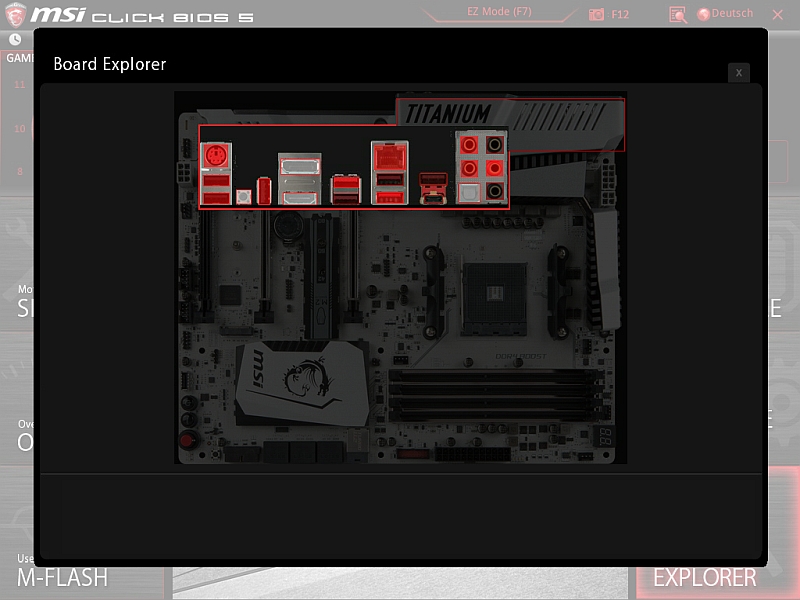
In addition there is the board explorer, the marked red areas are the occupied slots / connections:
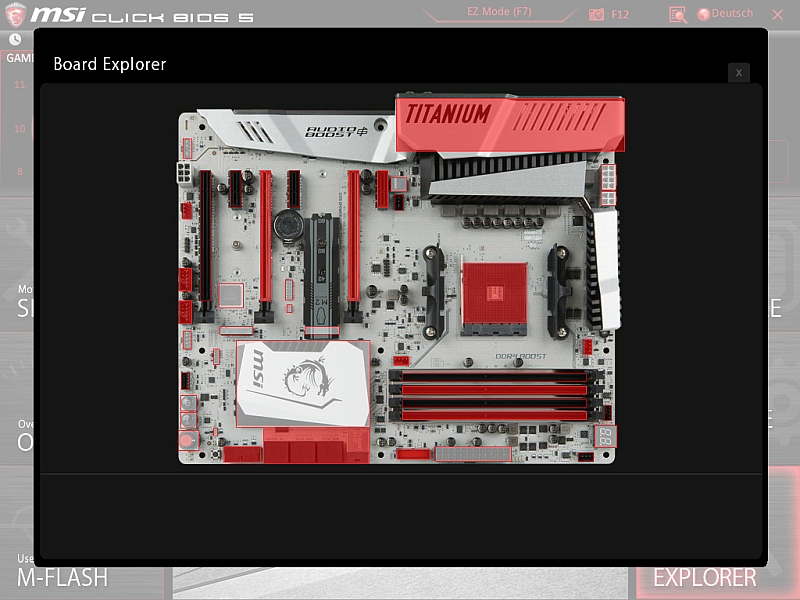
You can also display the slot slot:
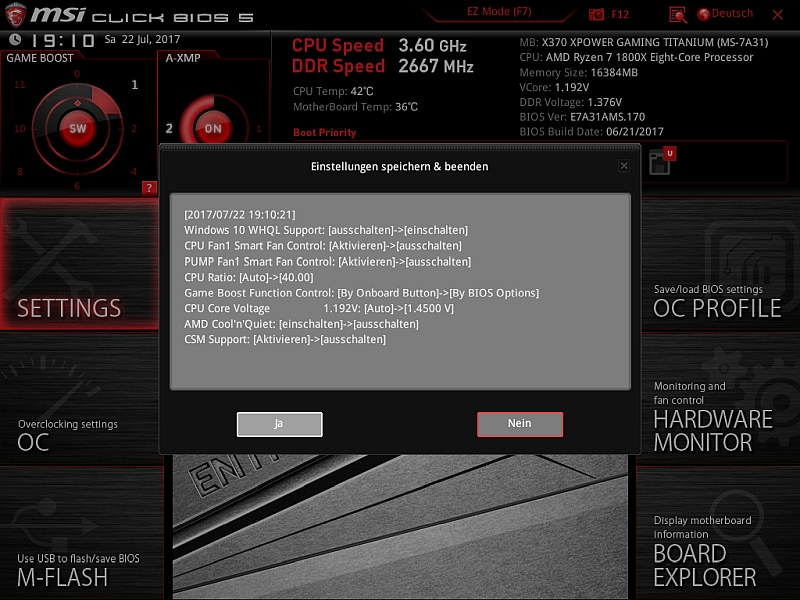
When terminating the UEFI BIOS we get detailed the changes in an overview, which I really liked.
Let's get to the test setup and the test ...
The whole is integrated into an Aerocool P7-C1 with the following hardware:
CPU: AMD Ryzen 1800X
CPU cooler: Cryorig R1 Universal
RAM: 2x8GB HyperX Savage PC2666
GPU1: Sapphire R9 390X Nitro 8GB
GPU2: Sapphire R9 390 Nitro 8GB
M.2 SSD: Samsung PM961 256GB
SSD: Samsung 850 Pro 512GB
SSD: Crucial MX200 256GB
SSD: Toshiba Q Pro 256GB
HD: Samsung F1 1TB
HD: Seagate ST3000DM001 3TB
BS: Windows 10 HP 64bit
If the board is well upgraded, there is not much to see from the design.
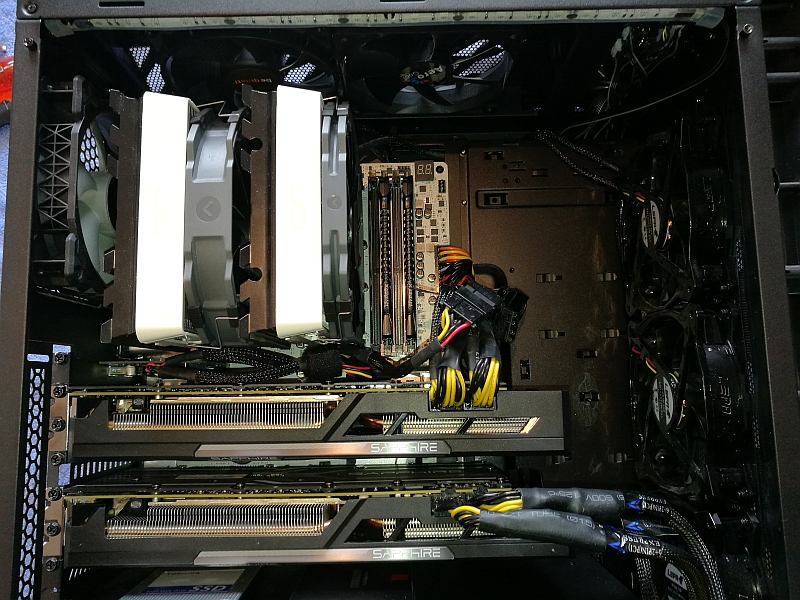
The change of the board was unspectacular and since the equipment of my ASRock X370 Killer SLi hardly shows any differences, the Windows start was smoothly and all components were recognized straightforward. A new installation I would avoid, since the current installation is relatively fresh and the hardware hardly differs.
I have tested the M.2 NVMe SSD with AS SSD ...

... as well as ChrystalDiskMark.
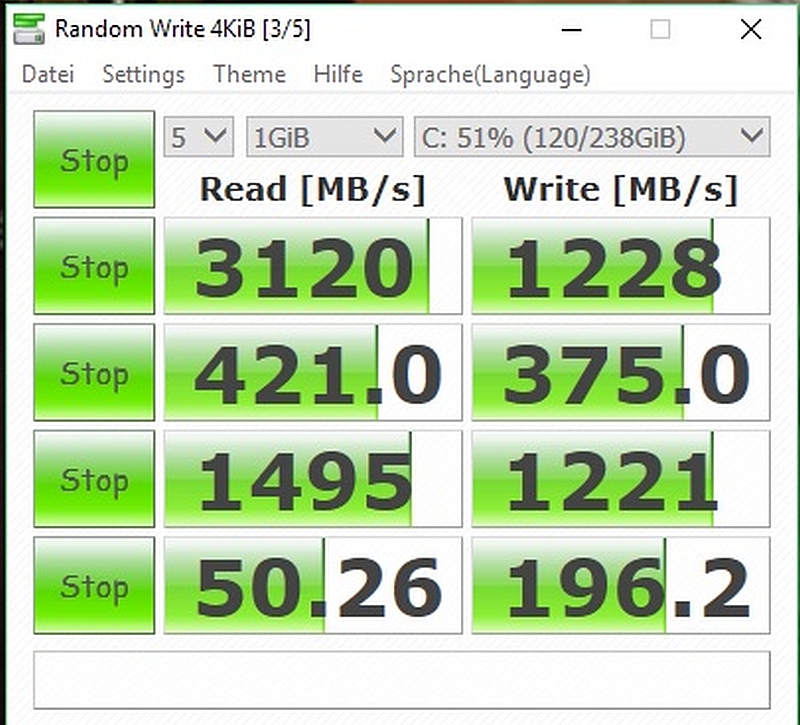
The performance of the M.2 slot is thanks to PCIe 3.0 4x absolutely within the scope of what this can do. The benchmark can not squeeze every little bit from the Samsung PM961, should be clear - after all, the disk is filled 50% and the operating system is already on it. The maximum read rate is only reached in the ChrystelDiskMark.
In reality, however, you will not notice any difference whether Windows is on the Samsung PM961 NVMe or the Samsung 850 Pro SATA SSD. A Wow! Effect, as when switching from a normal hard disk is not here.
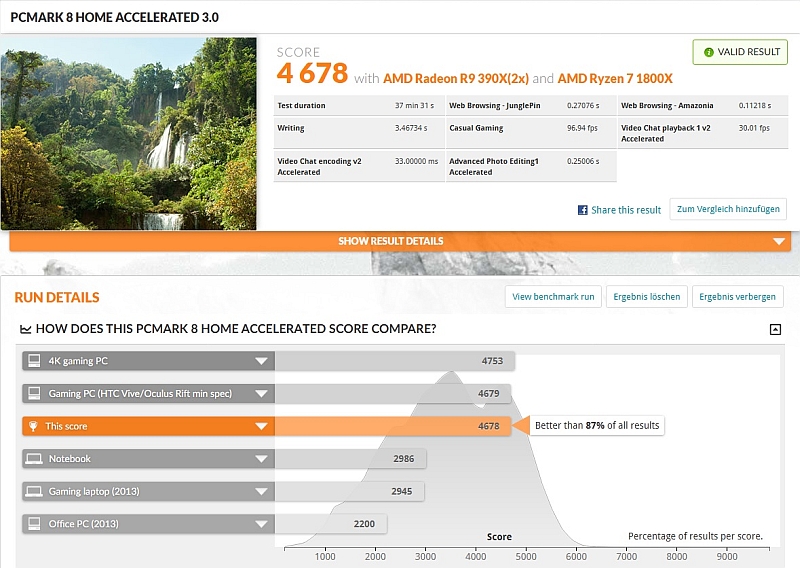
Now let's look at the performance of the complete system. PC Mark 8 Home (Conventional and Accelerated) and PC Mark 10.
PCMark 8 Conventional:

PCMark 8 Accelerated:
PCMark 10:
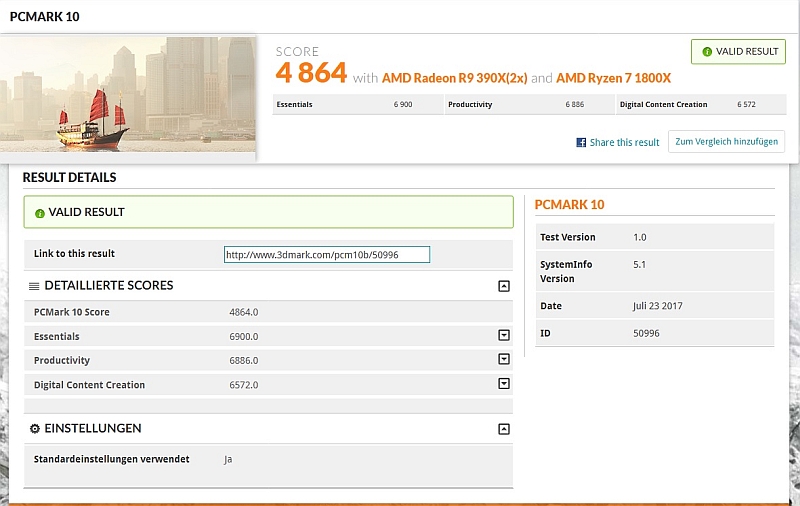
This benchmark also shows the overall high performance of the system.
6. Software
Finally, I take a look at the enclosed software:
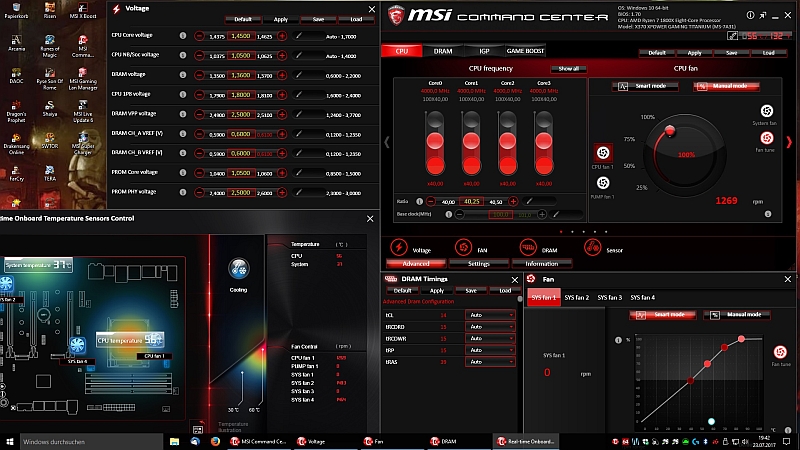
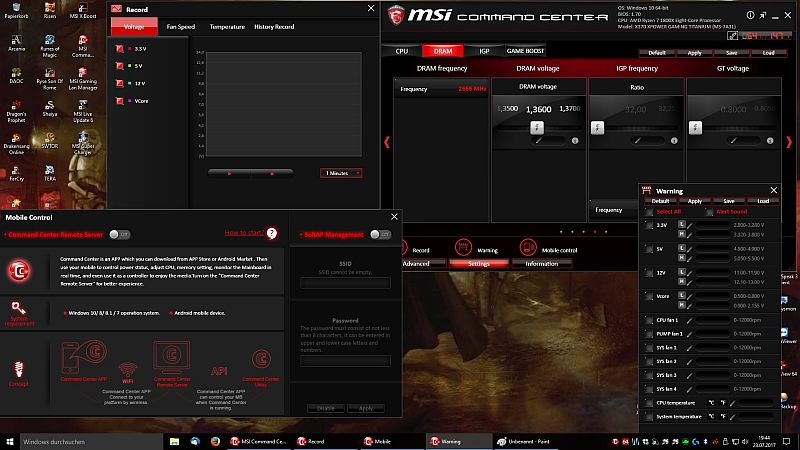
MSI Command Center
First, the MSI Command Center; here all the OC settings are combined in one surface. For me almost too much, so you might lose the overview. Overclocking I have not much tested since the performance of my Ryzen 1800X is currently sufficient in all matters. Only the GameBoost I tried on stage 1 and this ran steadily stable on 4GHz. In Overclocking by Offsets I am unfortunately not yet practiced, so I will look at first and try it out soon.
MSI Command Center CPU & Advanced:
MSI Command Center DRAM & Settings:
MSI Command Center Game Boost & Information:
The point IGP is not selectable, which also sounds logical since there is also no integrated graphics unit is present.
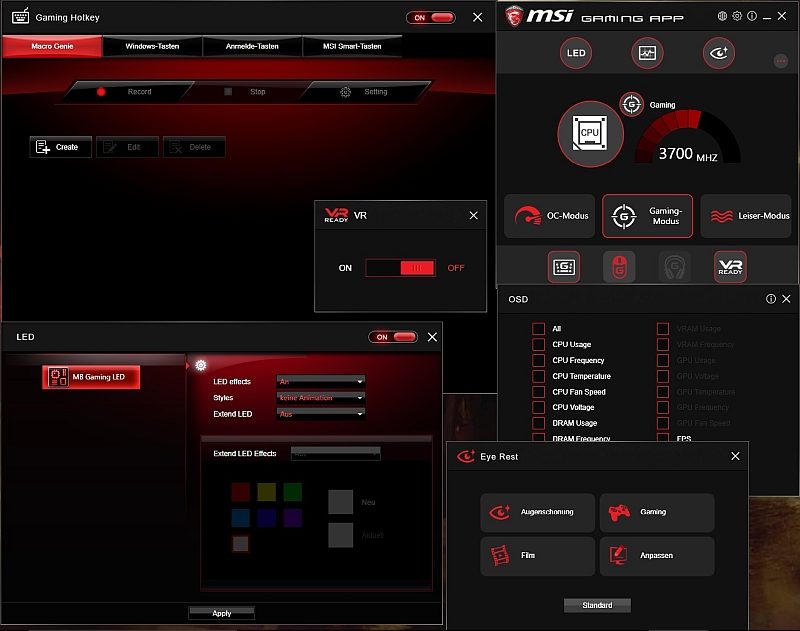
MSI Gaming APP
Now the MSI Gaming APP, in which you can make special gaming settings, such as. An overlay in which some monitoring information or the frames can be displayed per second in the game.
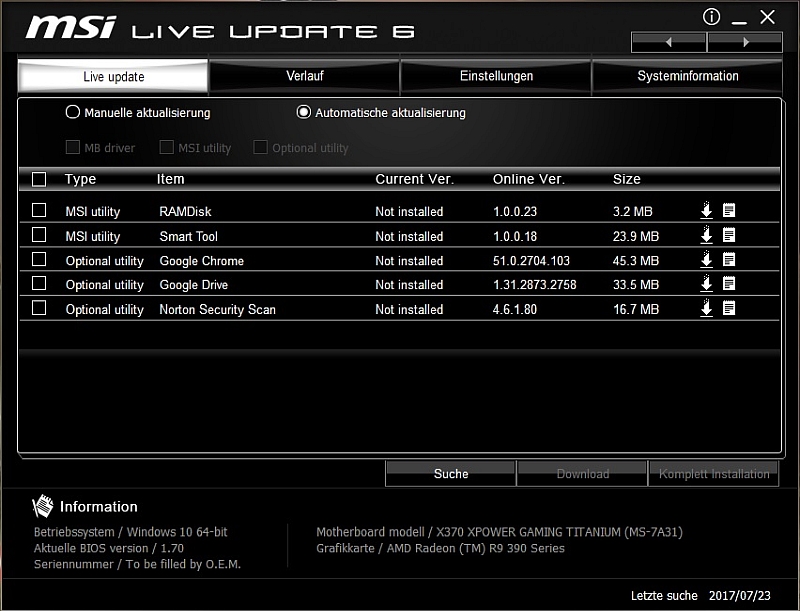
MSI LiveUpdate 6
The LiveUpdate in the version 6 must not be missing. On the first start, MSI offered drivers and apps for updating, which were already installed. After the download and start of the update, which was aborted (newer drivers were installed and the program was already installed), LiveUpdate did not display them anymore. Although nothing was really changed.
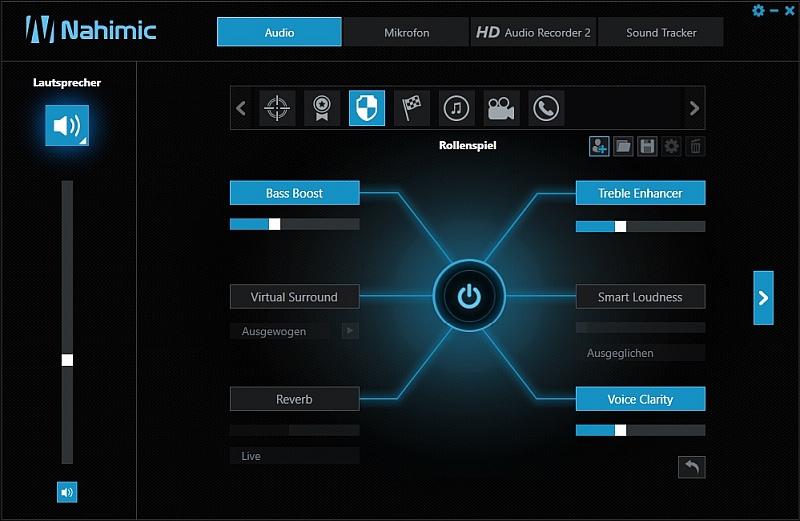
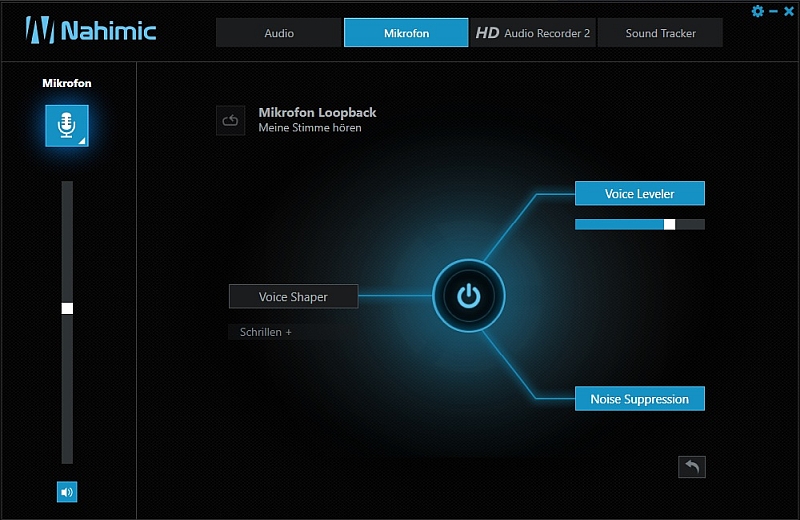
Nahimic 2 +
In addition, you can also "tune" the sound. For this purpose, MSI has linked to the Realtek HD Audiochip in conjunction with the Nahimic 2+ audio software. Under Audio you can use various preset profiles for various different games like MMO or Rally etc.
In the tab for the microphone, Activate the reverb suppression. This is called AEC here and you will find it together with MIC Boost, etc., by clicking the small arrow at the Mic.
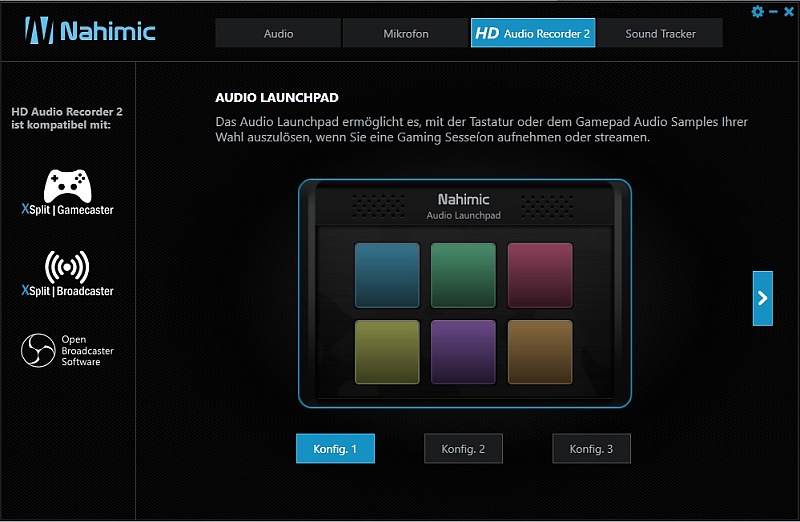
For streamer, there is also the HD Audio Recorder 2 function, using the gamepad or keyboard buttons for various sounds.
Then there is the point Soundtracker, here can be shown in certain games a kind of tracker as an overlay, which by means of certain sound information the direction of the opponents. Here, however, unfortunately only very few games are supported, of which I unfortunately possess none except of The Wichter 3. And so does a function somehow makes no sense, with the sorceress I know also where enemies are, or see them in the mini map.

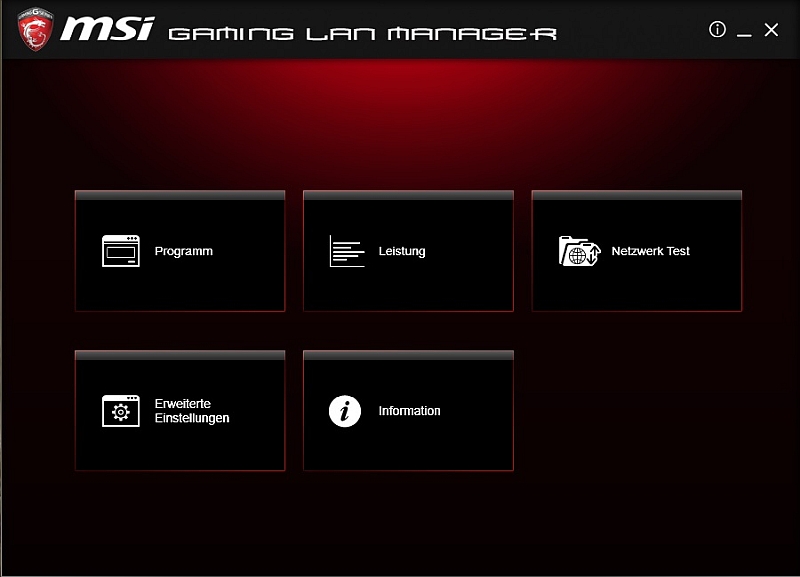
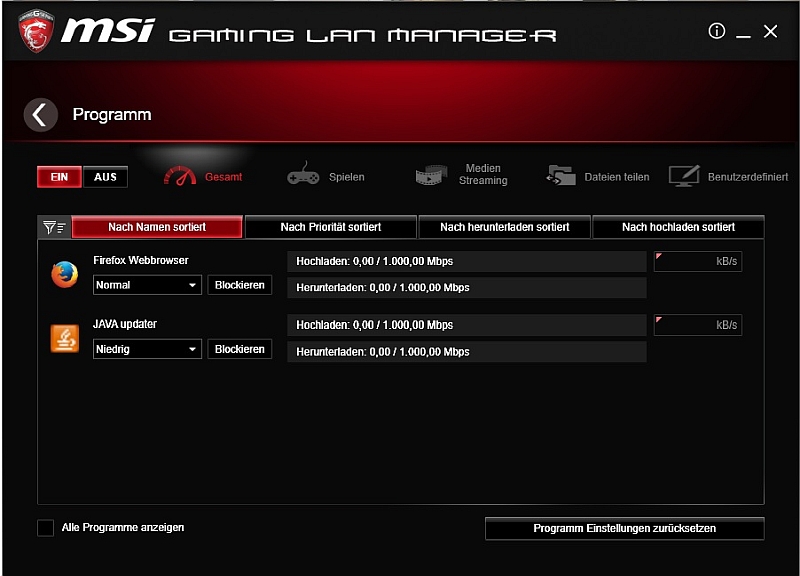
MSI Gaming LAN Manager
And finally, there's the MSI Gaming LAN Manager. Most people know this from Killernetwork, which MSI also installed on some boards. The function is similar in large parts.
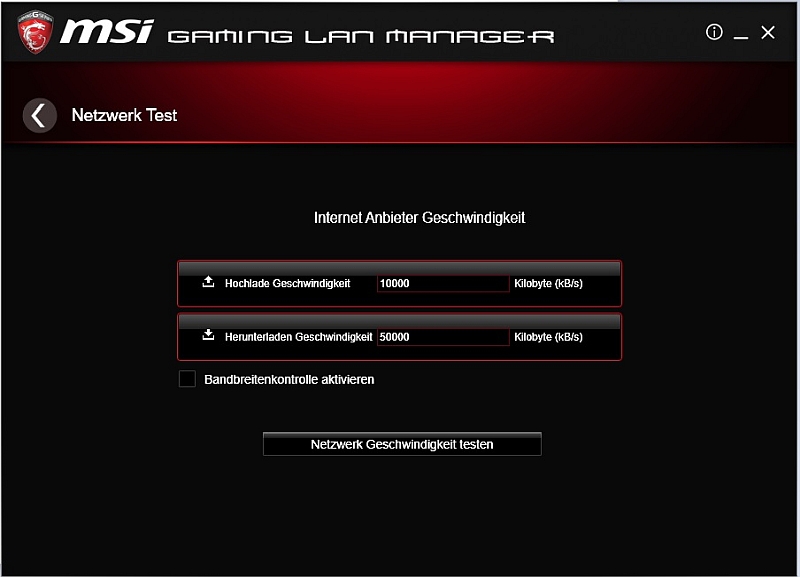
Only the network test is in my opinion very cumbersome and especially inaccurate. Here you will be redirected to the Cfos page. The data obtained must then be entered manually. Since here however only very inaccurate is measured, I can only recommend other bandwidth meters or you simply enter the booked bandwidth.
In the program, you can enter your own priorities for each software, so that you will not be interfered with by other programs (automatic updates, etc.) that want to allocate bandwidth during online gaming.
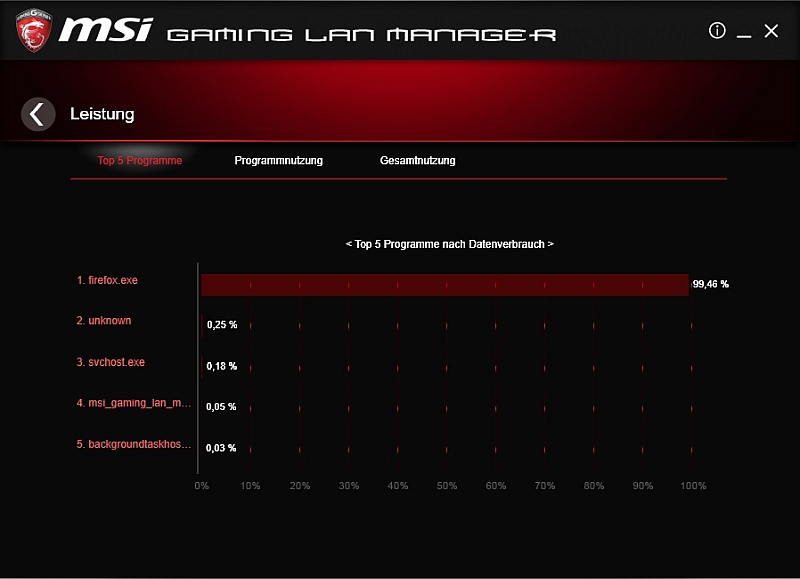
Under the item performance there are only statistical evaluations, when which programs have got what bandwidth, etc.
The point Advanced Settings provides only some, in my opinion senseless, tuning options as well as an IP blocking option.
Finally, the information, somehow self-explanatory.
7. Conclusion
MSI once again succeeded an all-round carefree package with the MSI X370 XPower Gaming Titanium, that shines with good performance and useful software.
Only the scope of delivery disappointed a little bit. A few cables or as mentioned above a slot bracket with USB connections would be desired.
The quality of the motherboard is above all doubt and looks all of a piece. Also the optics there is nothing to complain about and is a pure taste. I personally like the color scheme very much and it also harmonizes with the blue lighting of my tower and the white Cryorig R1.
The price of the board is with 270 Euro not very inexpensive, because boards with X370 chipset are already available from about 115 Euro. These have however also a significantly poorer equipment and only a 4-layer design, which saves a lot of money however the signal quality would be not as good, which is very important especially for OC.
I personally normally would not buy such an expensive motherboard, but MSI has managed to convince me of this board. The board is worth its money in any case. This is why I would like to give you my recommendation for this board.
I would also like to thank MSI Deutschland for the great MSI test-IT campaign.
In addition to this review I also have an unpacking with a small contest on my YouTube Channel.
Of course, I am also looking forward to seeing you there.
https://youtu.be/F53J0Lo4zKU
Here you can buy the MSI X370 XPower Gaming motherboard.
Continue to our hardware reviews area or directly to reader reviews with lots of more reviews ...
Write your own user review?
Get to the user review registration :thumb: